Building a Blog With Hugo - Part 3
Now that we have the basics for the site done let's begin customizing the theme/site
In the previous post, I covered how to build your first Hugo site using the Hugo Future Imperfect Slim theme. I also walked through the process to create the first blog post for your new site. In this post, I’m going to walk through different customization options for the theme. The customizations aren’t exhaustive but are good enough for you to get started and possibly expand on. Let’s get started.
Config.toml
The config.toml file, located at the root directory of your site, is where most of the site customization is done. Picking up where we left off in part 2, let’s review the very beginning of the file. It should look similar to the following text snippet:
baseurl                 = "https://example.com/"
DefaultContentLanguage  = "en"
title                   = "Learning Hugo"
theme                   = "hugo-future-imperfect-slim"
preserveTaxonomyNames   = true
paginate                = 3
disqusShortname         = ""
googleAnalytics         = ""
pluralizeListTitles     = false
disableLanguages        = [""]
The baseurl line sets the URL of where your site will ultimately be published. For now, we are going to skip this line and the googleAnalytics line. I’ll cover these in parts 4 and 5 of the series.
In addition to English, the Hugo Future Imperfect Slim theme supports multiple languages such as Spanish, German, French, and a few others. For now, leave the DefaultContentLanguage line as it is. If you know how to write/speak other languages, then I’ll leave it to you to translate anything we do in English to one or more of the languages you understand and get the multi-language support to work correctly.
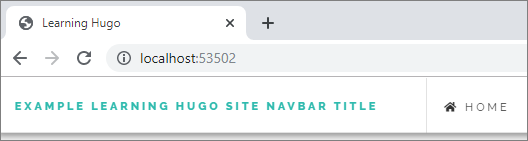
The title line is just what you think it is. It is where you set the title for the site. Change the text in the parentheses to your preference. As you probably noticed, I used “Learning Hugo” as the title for the example site I’m using in this series. This is the same text that appears in the title bar of the web browser if you aren’t using a tabbed interface. If you have enabled tabs then this will appear in the name of the tab as you can see in the image below:
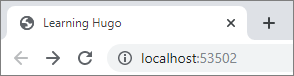
The title of the blog site as shown in a browser tab
The theme line is the name of the Hugo Theme in use. We set this in the previous post. So, you can skip this line.
You can ignore the preserveTaxonomyNames line. There is no need to change it unless you feel the need to create a custom taxonomy. What is a taxonomy? In Hugo-speak, a taxonomy is a way to classify content and define the relationships between the content. I suggest reading more about the subject on the Hugo taxonomy page.
The paginate line determines the number of posts that appear on the home page of your blog site. For now, keep this at the default. You can change the default if you would like to see how it changes the look of the site homepage.
We will skip over the remaining lines in this section of the config.toml file. As I mentioned previously, we’ll cover the googleAnalytics line in part 4 of the series. The disqusShortname line enables comments and discussion for posts on your site. I won’t be covering that in this series. But, if I do enable it on my site in the future, then I will write a post about it.
Params Section
The Params section is essential to how your site appears to readers. It also has several sub-sections. I will go over all sub-sections except for the staticman and recaptcha sub-sections.
The main section of your Params section should look similar to the text snippet below:
[params]
  mainSections = ["blog", "post"]
  # Loads CSS and JavaScript files. The variable is an array so that you can load
  # multiple/additional files if necessary. The standard theme files can be loaded
  # by adding the value, "default". Default includes the add-on.css and and-on.js.
  # Example: ["default", "/path/to/file"]
  cssFiles              = ["default"]
  jsFiles               = ["default"]
  # Sets options for highlight.js
  highlightjs           = true
  highlightjsTheme      = "github"
  highlightjsLang       = ["html", "css", "js", "toml"]
  # Sets where "View More Posts" links to
  viewMorePostsLink     = "/blog/"
  # Activate Estimated Reading Times, which appear in the post headers
  readingTime           = true
  # Sets which Social Share links appear in posts.
  # Options are twitter, facebook, reddit, linkedin, pinterest, email
  socialShare           = ["twitter", "facebook", "reddit", "linkedin",
                          "pinterest", "email"]
You can leave all of the “option lines” at their default. But, the last line, socialShare, is the one you should modify. This line determines which social network link appear with your post and make it easy for your readers to share your blog posts.
Here is an example of a blog post with all of the socialShare icons at the beginning of the post.
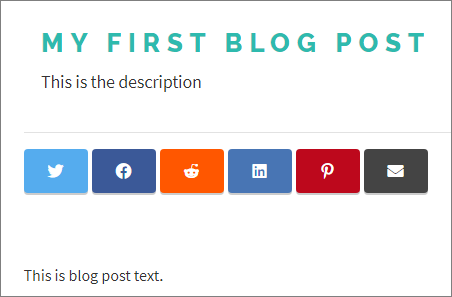
socialShare icons
Params.meta
The Params.meta sub-section contains items that can be picked up by search engines. Your Params.meta sub-section should look similar to the text snippet below:
[params.meta]
    # Sets the meta tag description
    description         = "An example blog site built on Hugo, the fastest statice website engine and skinned with the Hugo Future Imperfect Slim theme by HTML5 UP and ported by Julio Pescador.  Slimmed and enhanced by Patrick Collins. Multilingual by StatnMap."
    # Sets the meta tag author
    author              = "Whoever is working on this blog site"
    # If you would like to add more comprehensive favicon support past the root
    # directory favicon.ico, utilize this function. It is recommended to use
    # https://realfavicongenerator.net to generate your icons as that is the basis
    # for the theme's naming.
    favicon             = false
    svg                 = true
    faviconVersion      = "1"
    msColor             = "#ffffff" # Copy from the https://realfavicongenerator.net
    iOSColor            = "#ffffff" # Copy from the https://realfavicongenerator.net
My recommendation is to update the description and author lines to reflect you better. I’ll leave it to you to create a favicon for your site. I haven’t done this yet. But, when I do, I’ll post about it.
Params.header
This sub-section is where you will set the text shown in the web browser title bar or the tab in which users are viewing your site. It will also dynamically change the text based on the section of your site a user is viewing. For now, all you need to do is update the navbarTitle line.
If you have no intention of supporting multiple languages on your site, then make sure you update the languageMenu line to false.
The text snippet below is what the params.header sub-section looks like after I made the changes I suggested:
  [params.header]
    # Sets the navbarTitle that appears in the top left of the navigation bar
    navbarTitle         = "Example Learning Hugo Site navBar Title"
    # Sets navbarTitle to match the section of the website
    dynamicTitles       = true
    searchMenu          = true
    shareMenu           = true
    languageMenu        = false
You can see the navbarTitle hightlighted in green text in this image:
navbarTitle highlighted in green text
Params.intro
This sub-section is where you will set the text that appears under the header image in the left sidebar of the site.
The only lines that need to be updated in this sub-section are: header and paragraph.
The header line is the text directly under the header image in the sidebar.
The paragraph line is the text located between the header text and the social media accounts that appear in the sidebar.
You can ignore the last two lines in this sub-section. Here is a snippet of the params.intro sub-section after making the changes I mentioned:
  # These are optional params related to the sidebar. They are recommended, but not
  # required for proper functionality. HTML is supported within the params.
  [params.intro]
    header                = "Learning Hugo header text"
    paragraph             = "This text is beneath the header text.  </br>You can also put links in the text. </br><a href='http://someURL.com'>Your Blog</a>."
    rssIntro              = true
    socialIntro           = true
Params.intro.pic
This sub-section is a sub-section of the params.intro sub-section. It is pretty easy to understand what is in this section, a logo that represents you and your blog site. On my blog site, I used a headshot of myself. But, you may want to get a little more creative and create or choose something more appealing to your style.
Make sure that any image you create or choose is no more than 100 pixels (px) wide and no more than 100px in height. Once you have determined the image you are going to use then store the image in the following directory of your site:
<site root directory>\static\img\main\
If you decide to name the image logo.jpg, then the src line would appear as: “/img/main/logo.jpg”
Next, you need to pick the shape of the image mask for the site logo. I went with a circle on my site. Other options are: triangle, diamond, or a hexagon. The shape line is where you set this option.
Optionally, you can set the width of the image on the width line. I left this line at the default.
For the alt line, I put a simple description of the logo image. The browser uses this text as the image is downloaded. I also believe it is used by sight-impaired folks who use special reading software to view websites.
The following image shows where the params.intro text and params.intro.pic image are displayed on the home page.
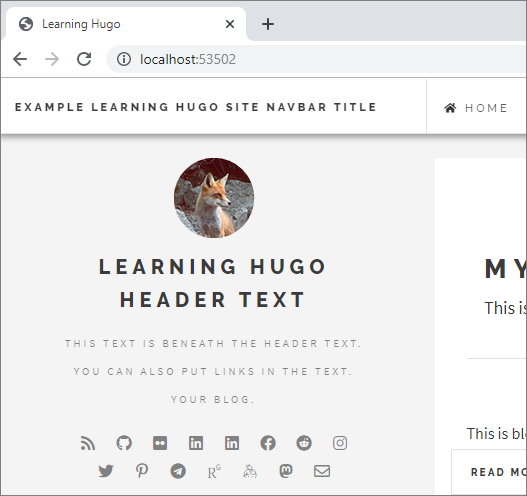
params.intro and params.intro.pic options
Params.sidebar
This sub-section controls the about text in the sidebar, the number of recent posts shown in the sidebar, whether or not the blog categories are displayed, and the order they appear.
Update the about line with a short description explaining your blog site. This text is displayed just below the blog categories in the sidebar.
The postAmount line sets the number of recent posts that are displayed in the sidebar. Update this setting to what suits you.
The categories line determines if the blog categories are displayed in the sidebar. The categories appear after the most recent posts.
The categoriesByCount line determines if the categories are sorted alphabetically or by the number of posts in each category.
This image shows what these options could look like:
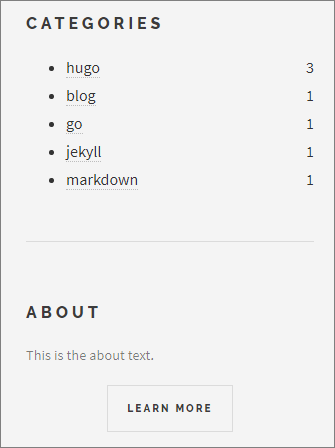
params.sidebar options
Social Section
This section appears just under the params.intro text and at the very bottom of the sidebar. It displays all of the ways readers can contact you via different social networks. There are a bunch of them. So, determine which ways you want your readers to contact you or follow you on the social networks you use and update the section accordingly.
Summary
Phewww! This post turned out to be longer than I expected. If you want to see all of the updates I suggested to make to the config.toml file go to my GitHub repositories listing and look for the exampleSite repository.
Be sure to come back to read the rest of the posts in the series or review posts I have already written.
Series Table of Contents
Here are links to the rest of the series:
- Part 1: A quick introduction to GitHub Pages and Hugo
- Part 2: Creating your first Hugo site
- Part 3: Customizing your theme/site
- Part 4: Configuring Google Analytics
- Part 5: Publishing your site
If there is something you think I’m missing and feel should be added, please let me know.