How to Update Esxi 7.0u3d to 7.0u3k using vSphere Lifecycle_Manager
This post will cover how to update an ESXi host to 7.0u3k from 7.0u3d using vSphere Lifecycle Manager.
Recently, I ran into an issue where I really needed to get my vSphere homelab upgraded to version 7.0U3k. More on why this was so urgent in a future post. However, I was still back on 7.0U3d. To get to 7.0U3 I used vSphere Lifecycle Manager (vLCM). In case you missed it, vSphere Lifecycle Manager is built into vSphere 7.
If you aren’t familiar with vLCM, then you can read more about vSphere Lifecycle Manager over here: https://blogs.vmware.com/vsphere/2020/04/vsphere-7-patching-lifecycle-management.html
The great thing about vLCM is that it is an easy way to update ESX hosts in an automated fashion. Continue reading to see how I made this super simple for myself.
Let’s get started!
To begin, login to vCenter. Once you have logged in select Lifecycle Manager from the left-hand admin panel.
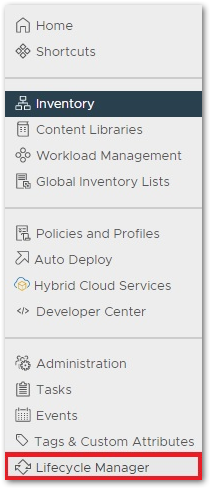
vSphere Lifecycle Manager menu option
This brings you to the vLCM interface. You can see all of the updates which vLCM knows about. The image below shows that I have selected ESXi 7.0U3k. Details about the image are displayed to the right of the selected image along with the Release Notes.
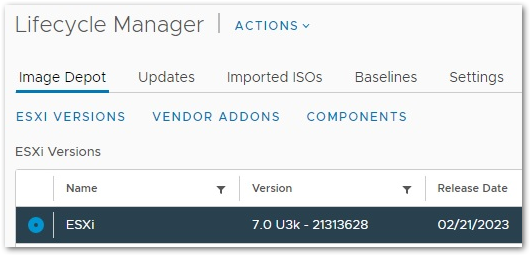
7.0U3k update image
Now that you have determined the update image is available you can now move to the ESX host you want to update.
Select your ESX host, click “Update” and then select “Baselines” if it isn’t automatically selected.
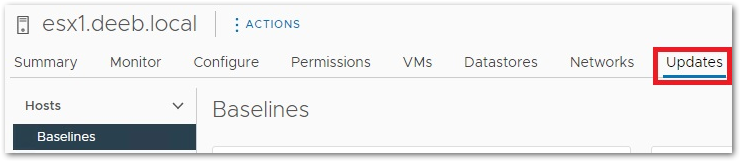
ESX host update baselines
Scroll down the page and you will see the attached baselines. You will see from the image below that I have 3 baselines attached to my selected host. Before I began the update the ESX 7.0U3d baseline was the only attached baseline. I created this baseline quite a while ago. If this is the first time you have used vLCM then you may not have any baselines or you have the top two baselines in the list, but the status is not showing as “Compliant.”
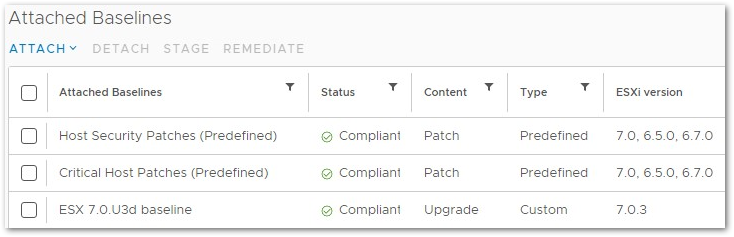
Available baselines
Next select the top two baselines then click Attach, then “Attach Baseline or Baseline Group”
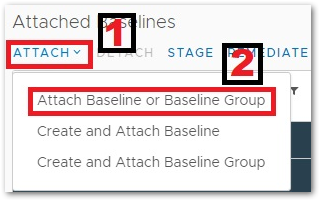
Attach Baseline
Select the baselines I show in the image below and click the Attach button. You will now have the following baselines attached to your ESXi host.
- Host Security Patches (Predefined)
- Critical Host Patches (Predefined)
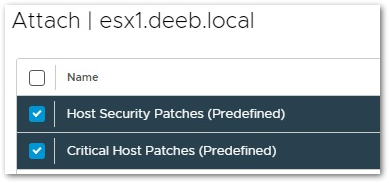
Attach Baseline
Now all you have to do is select the baselines you just attached to your host. Then click “Remediate.”
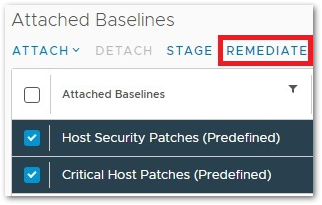
Attach Baseline
Wait several minutes for the process to complete and you will then have an updated host.
NOTE: When you click Remediate you will have the option to move all VMs, including powered-off VMs, off the host. This is assuming you have DRS enabled in your cluster.
This is what your host should look like once the remediation completes. Obvisously, you won’t have the third baseline attached to your host.
Compliant host
I hope this post has helped you.
Related Posts
Here is a link to an alternative update process from my vCommunity buddy Al Rasheed
If there is something you think I’m missing and feel should be added, please let me know.
Thanks for reading!