How to Add KeyControl v5.4 as a Key Provider in VSphere 7
This post will walk you through the steps to add Entrust KeyControl v5.4 as a Key Provider in vCenter v7.x. **Updated 10-15-2021**
To get started here is what you will need to complete the steps in this post:
- A deployed Entrust KeyControl v5.4 cluster (Click this sentence to learn how to do this)
- vCenter and ESXi Host(s) running vSphere 7.x
Now, let’s get started…
Enable the KMIP Server in KeyControl
-
Log in to the deployed Entrust KeyControl cluster and click the KMIP menu item.

KMIP menu item
KMIP Server Settings
This is the screen where you will enable and make changes to the KMIP server settings.
-
Change the State field from Disabled to Enabled.
-
You will also need to change the version of the KMIP Protocol the server speaks in the Protocol field. Change the version from the default of 1.0 to 1.1
VMware supports KMIP version 1.1 for Key Providers.
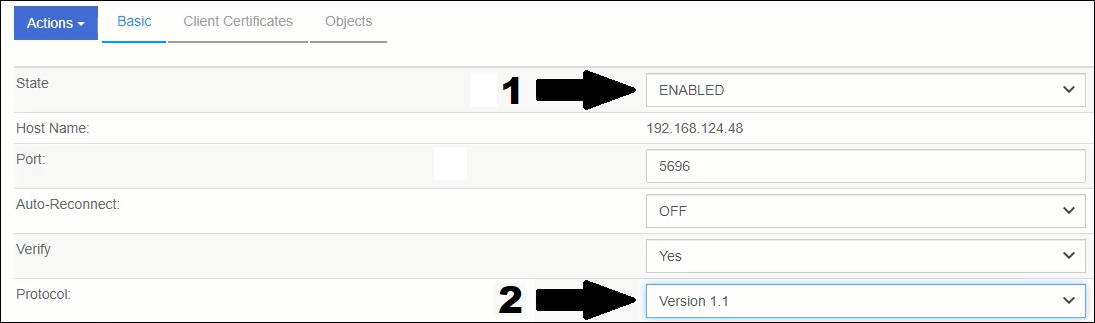
Configured KMIP options
After you have made these two changes click the Apply button. You will be presented with a dialog to “Overwrite all existing KMIP Server settings”. Click Proceed.
Create a Client Certificate
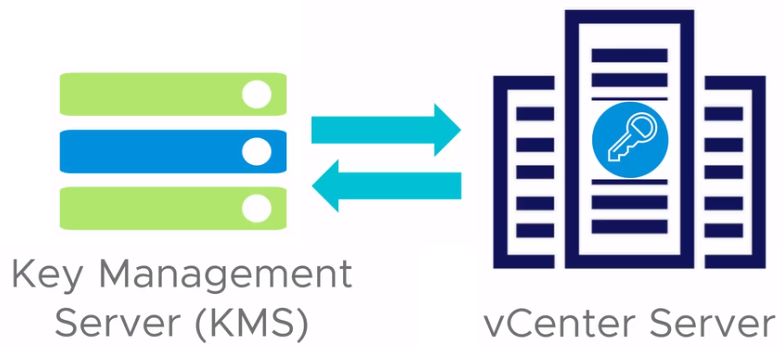
The communication between Entrust KeyControl and vCenter is done via certificates. So, the next step in the process is to create a client certificate for this purpose.
-
Next to the blue Actions button, you will see the text, Client Certificates. Click this text, then click the blue Actions button and select Create Certificate.
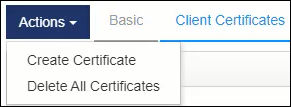
Create Certificate
-
Enter a name for the certificate in the Certificate Name field. You can adjust the expiration date. But, do NOT add a certificate password. Adding a password will prevent vCenter from importing the certificate. Finally, click Create.
***** Please read this *****
Even though I mention above that you should NOT enter a password in the dialog below I want to hammer this point home. It was recently brought to my attention by one of my colleagues in our Support organization that some of you are inadvertantly entering passwords in this dialog box.
I know you probably have raised eyebrows telling yourself “What is he talking about?” Keep reading.
Some of you probably use a password manager which has the ability to automatically fill in passwords in dialogs like the one below. If this is you, then make sure you clear the password fields that your password manager automatically filled in for you BEFORE you click the Create button.
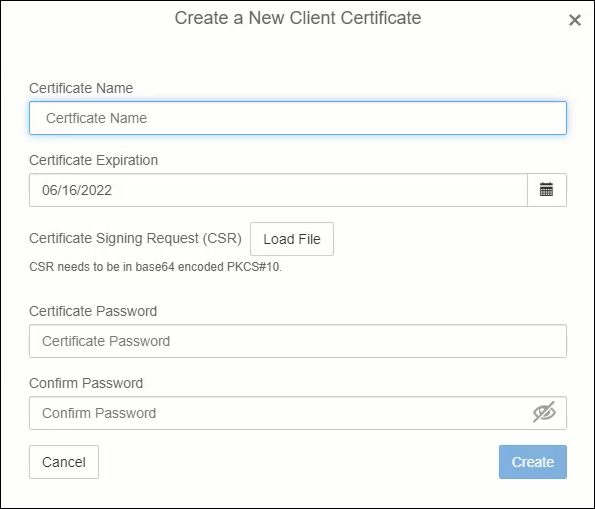
Create New Client Certificate screen
-
You will see the new certificate in the WebUI. Click the certificate, then click the blue Action button and select Download Certificate. This will result in a zip file being downloaded to your system. Unzip the contents of the file. You will need the unzipped contents later.
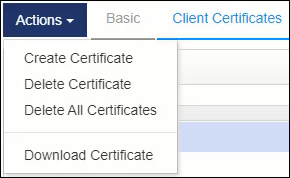
Download Certificate
Add a Key Provider
Log in to vCenter. Then perform the following steps.
-
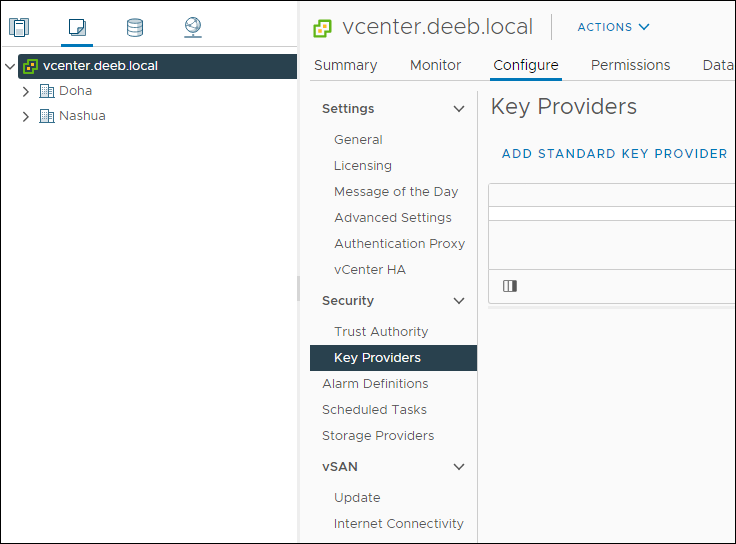
Click on the name of your vCenter
-
Click Configure
-
Click Key Providers in the Security section
-
Click Add Standard Key Provider
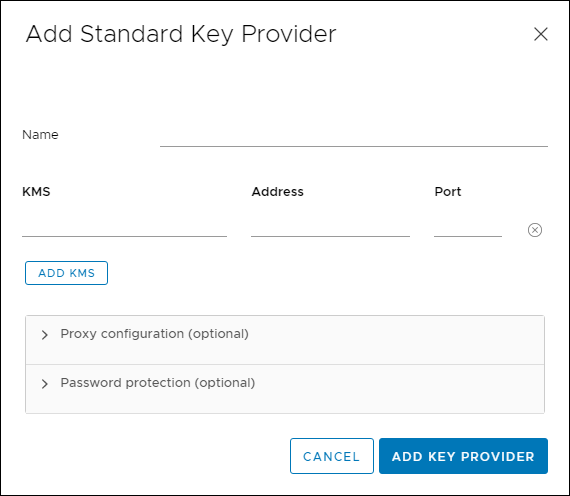
Add Standard Key Provider
-
Enter a name for the Key Provider. This is just a reference name. It doesn’t need to match any name you use in Entrust KeyControl.
-
Enter a name for the KMS Server and the IP Address or FQDN of the first KeyControl node. I typically match the name of the KMS Server to the hostname of the node I’m adding. Click the Add KMS button and add the second KeyControl node.
-
You can ignore the optional proxy and password sections. Click Add Key Provider when you are finished.
***** Please read this *****
Just like I mentioned above about inadvertantly having a password automatically entered for you by your password manager when creating the client certificate. The same colleague of mine asked me to remind you that sometimes the same thing happens during this step in the process.
So, make sure you expand the Password Protection section of the dialog below and confirm the fields are blank before clicking the “Add Key Provider” button.
It will be apparent to you that you inadvertantly entered a password. When you go to encrypt a VM, (which I cover in my next post) you will receive an error similar to “KMIP Response: Operation Failed DENIED”
To resolve this issue remove the Key Provider and run through the steps in this section. Just make sure to remove the password BEFORE you click the “Add Key Provider” button.
Standard Key Provider Details screen
The certificate details for each node will be displayed.
-
Click the Trust button.
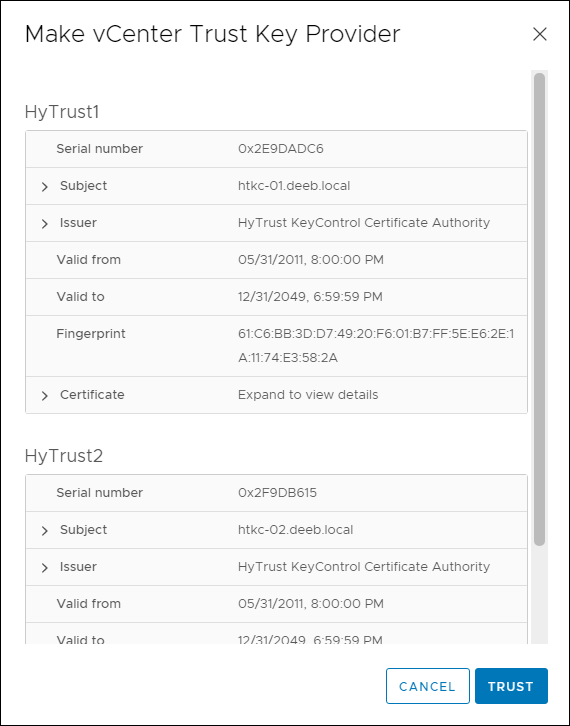
KMS Node Certificate Details
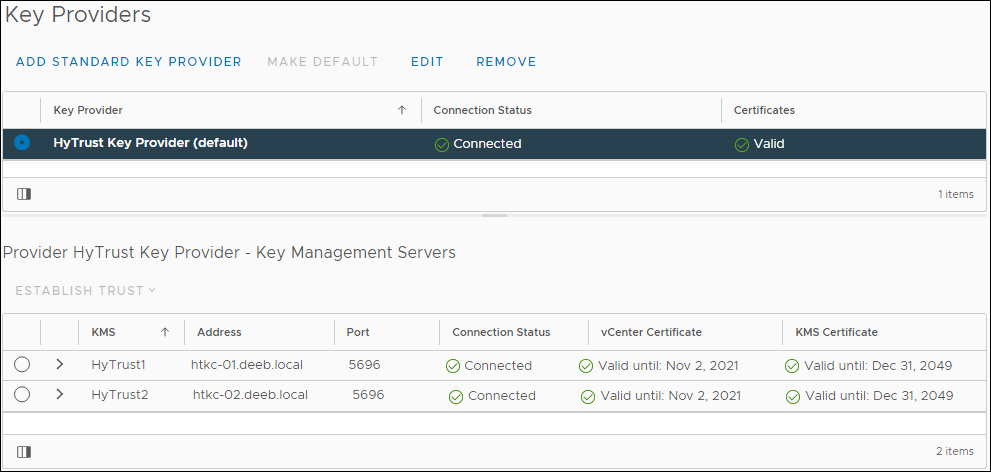
The newly added Key Provider will be displayed.
-
Check the radio button next to the Key Provider. This will list the Key Management Servers at the bottom of the window. Yes, I know the image below still refers to HyTrust KeyControl. Habits are hard to break. HaHa!!
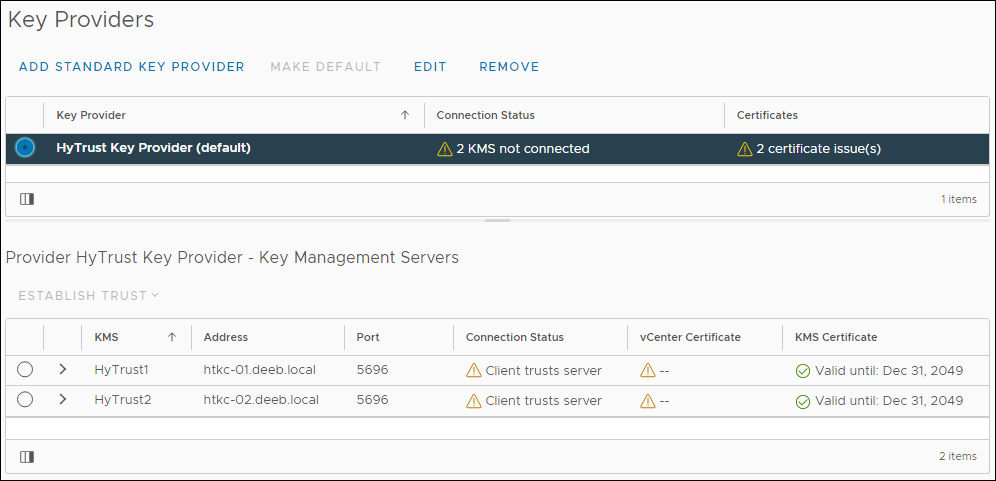
Key Provider list and KMS Servers
Establish Trust
-
Click one of the KMS servers, then click Establish Trust. Select Make KMS trust vCenter.
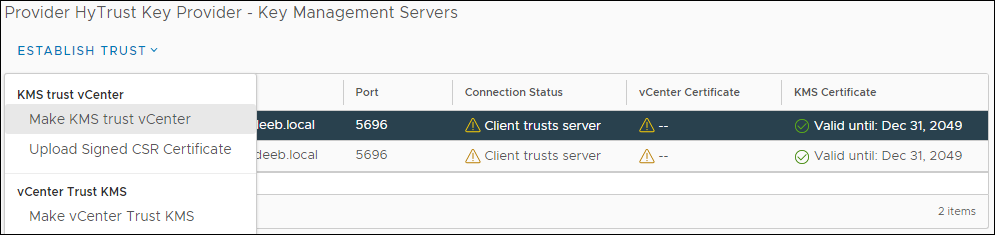
Make KMS trust vCenter
-
Click KMS certificate and private key, then click Next.
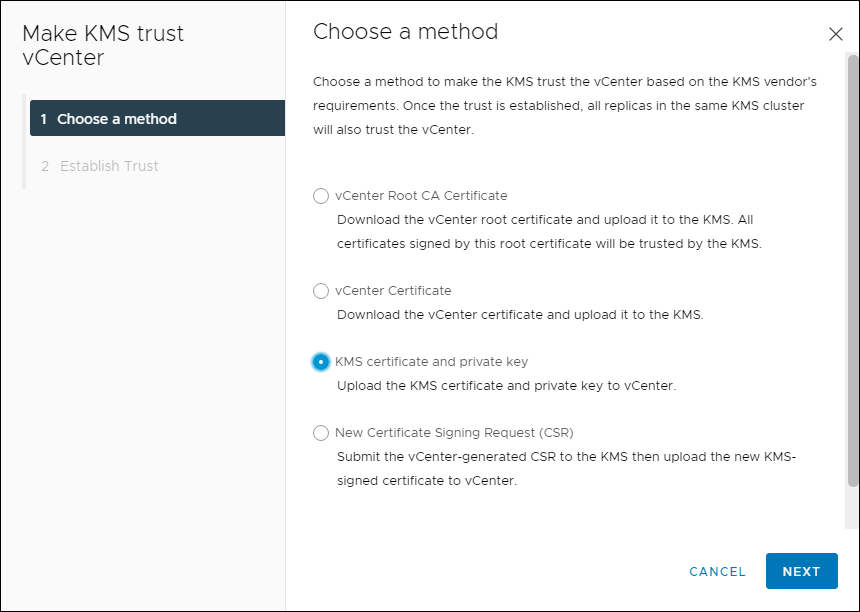
Choose a Trust Method
This is the point in the process where the client certificate is needed.
-
Click the KMS Certificate Upload a File button. Navigate to the location where you unzipped the contents of the client certificate zip file. You will see two .pem files. You can ignore the cacert.pem file. Select the second .pem file and click OK.
-
Repeat the last step for the KMS Private Key, then click Establish Trust
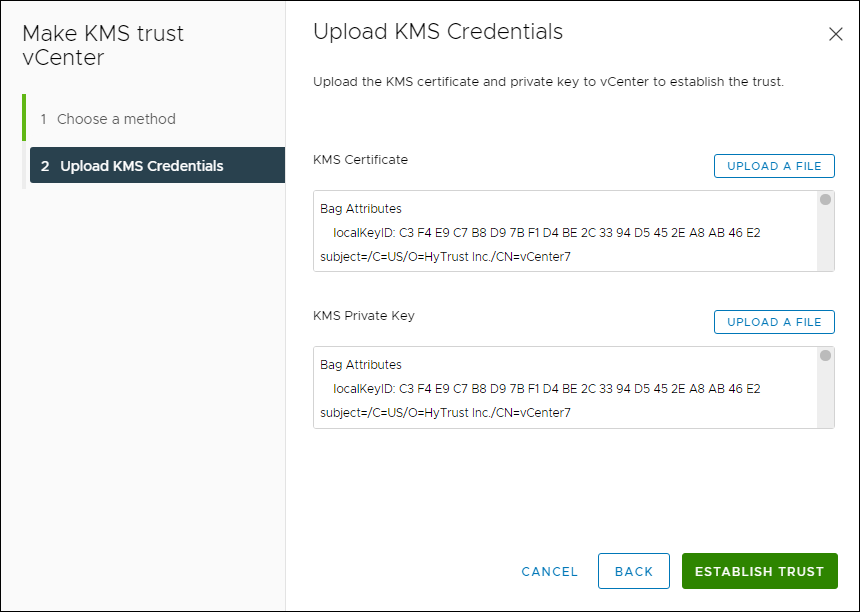
Upload KMS Credentials
-
At this point, all of the yellowish triangles from the previous step should now be green circles with checkmarks in them.
Trusted KMS Servers
If you want a bit more detail, expand one of the KMS Server entries.
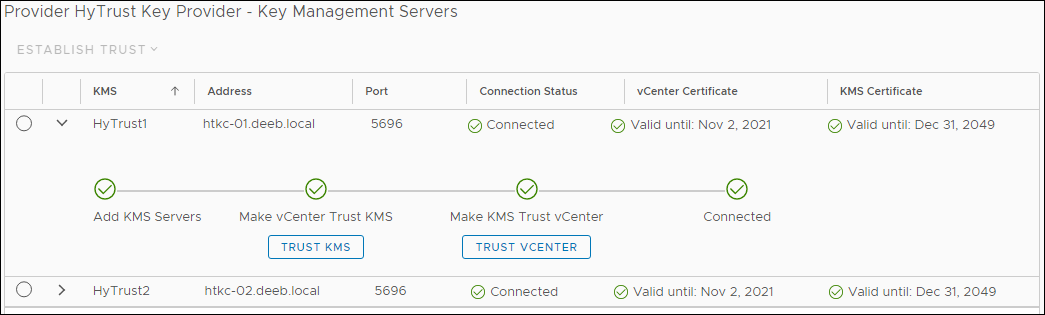
KMS Server Trust Details
Congratulations!! You are finished. You are ready to begin encrypting VMs or enabling encryption for vSAN.
Summary
Let’s summarize what was covered in this post:
- You created a client certificate using the 2-node Entrust KeyControl v5.4 cluster from a previous post
- You added a Key Provider to vCenter, which includes the two KeyControl Cluster nodes
- You established a trust between the KeyControl Cluster using the client certificate
In the next blog post, I’ll walk through the steps for encrypting a VM. I hope this post has helped you.
Related Posts
Here are links to related posts:
- Register for a 30-day trial of Entrust KeyControl
- How to deploy a 2-node Entrust KeyControl v5.4 cluster
- How to Connect Entrust KeyControl v5.4 to Active Directory
- How to Add a Another Security Admin to Entrust KeyControl v5.4 from Active Directory
- Entrust KeyControl YouTube playlist
- YouTube video: Entrust KeyControl - Adding a KMS Cluster as a Key Provider in vSphere 7
If there is something you think I’m missing and feel should be added, please let me know.
Thanks for reading!