How to Deploy a HyTrust KeyControl v5.2.1, 2-Node Cluster
See how easy it is to deploy a 2-node HyTrust KeyControl v5.2.1 Key Management Server (KMS) for encrypting sensitive data in virtual machines.

To get started here is what you will need to complete the steps in this post:
- KeyControl OVA v5.2.1
- vCenter and ESX host at least version 6.5 or greater
- 2 vCPU, 8GB RAM, 60GB disk per KeyControl node
- Network address information such as:
- IP address (one per node)
- Subnet mask
- Gateway address
- DNS server information
- DNS registered hostname for each node
Deploy the First HyTrust KeyControl Appliance
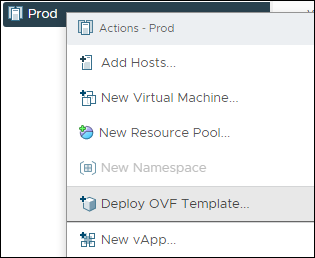
- Log in to the Virtual Center Appliance (VCSA). Once logged in, right-click and select Deploy OVF Template…
Deploy OVF Template...
- Click on Upload Files and navigate to the directory where you placed the HyTrust KeyControl OVA, select it, then click Open.
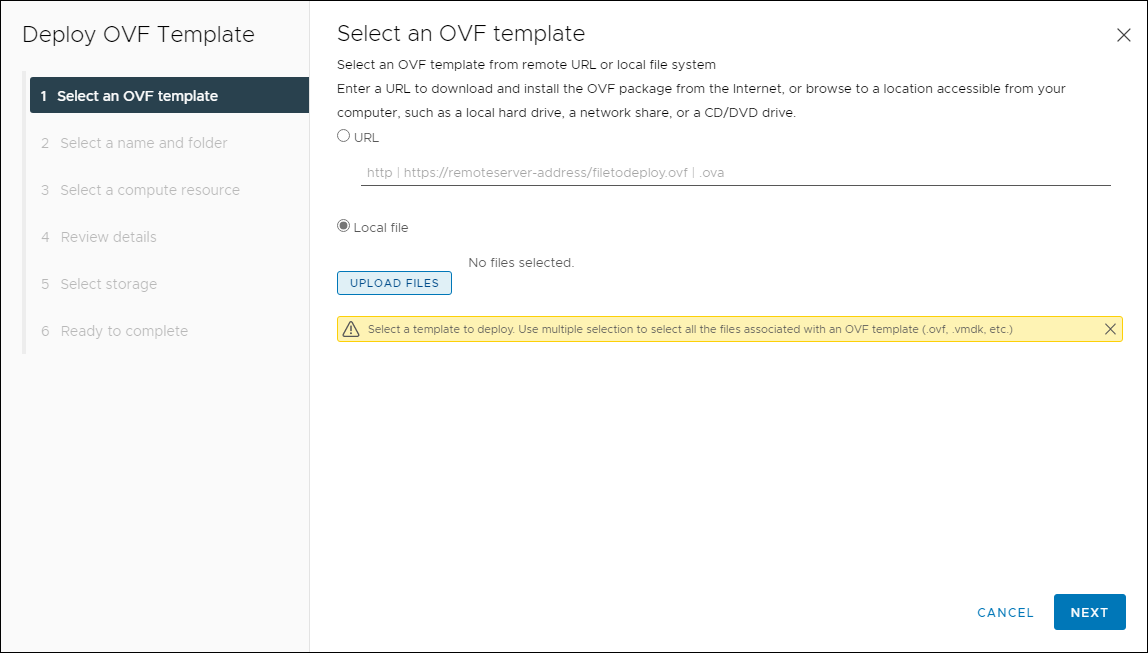
Select OVF Template
- Now that you have the HyTrust KeyControl OVA selected, click on Next.
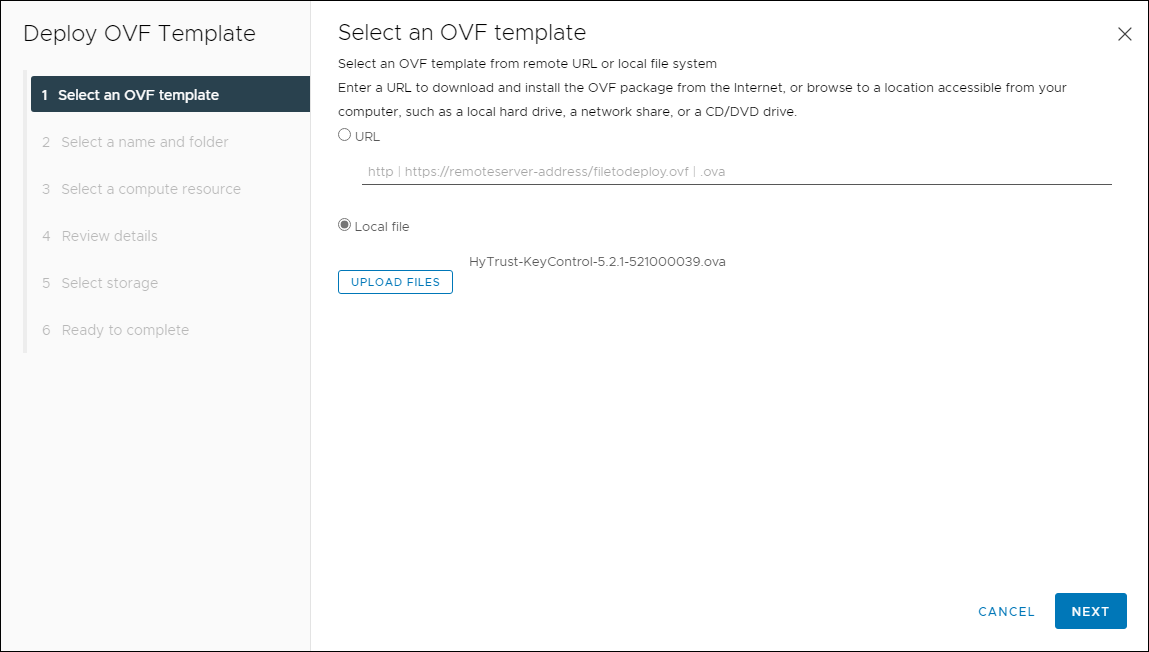
Selected OVF Template
- Provide a name for the HyTrust KeyControl appliance, select a deployment location, then click Next.

Select a Name and Folder
- Select the vSphere Cluster or host, then click Next.
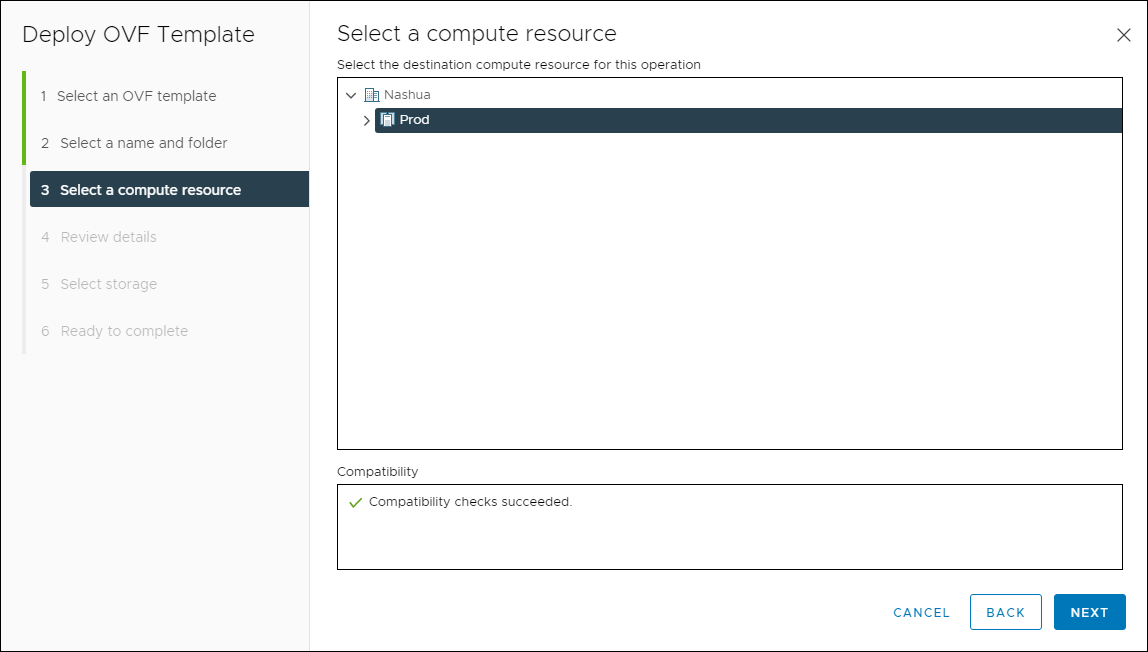
Select a Compute Resource
- Review the details, then click Next.
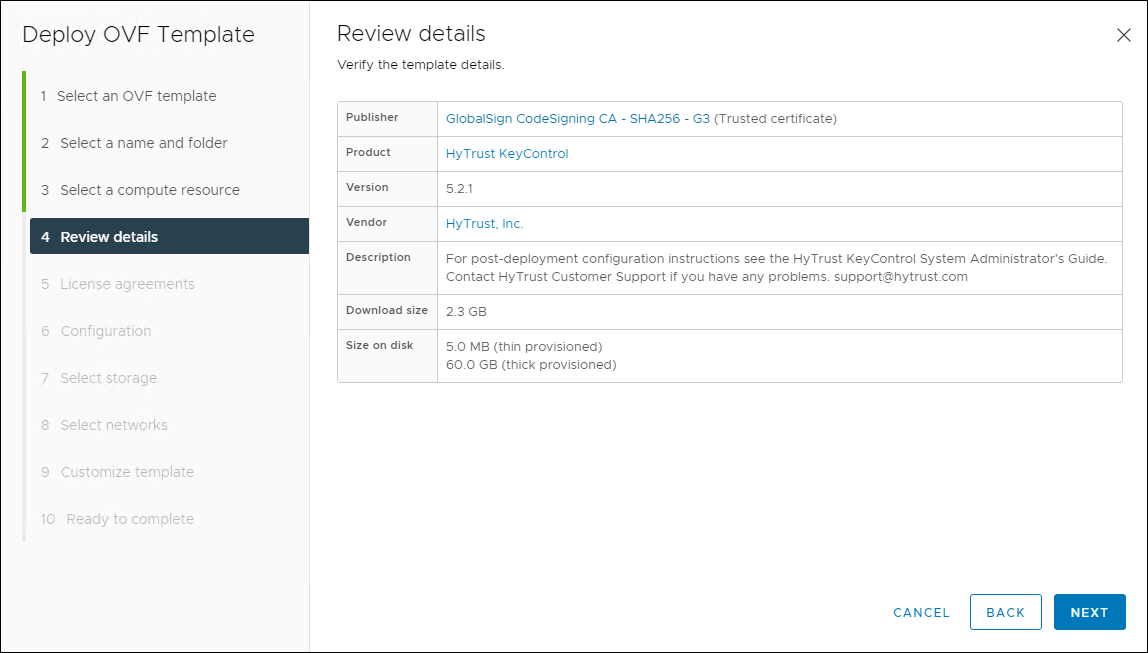
Review Details
- Accept the license agreement, then click Next.
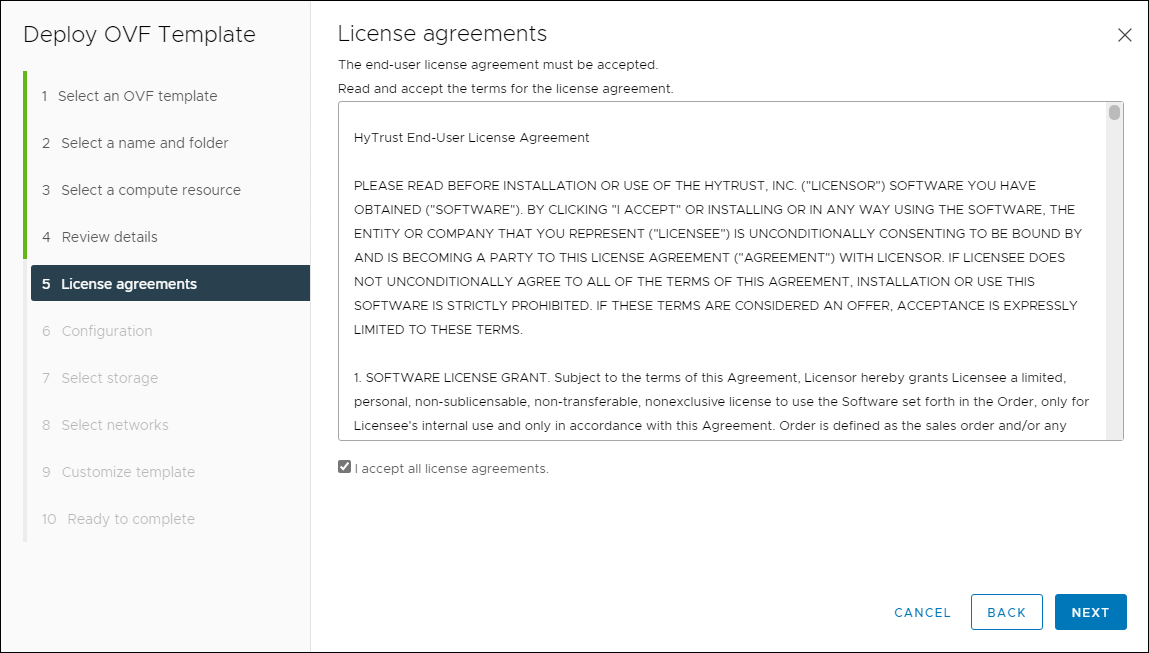
License Agreement
- Select the proper configuration from the list, then click Next.
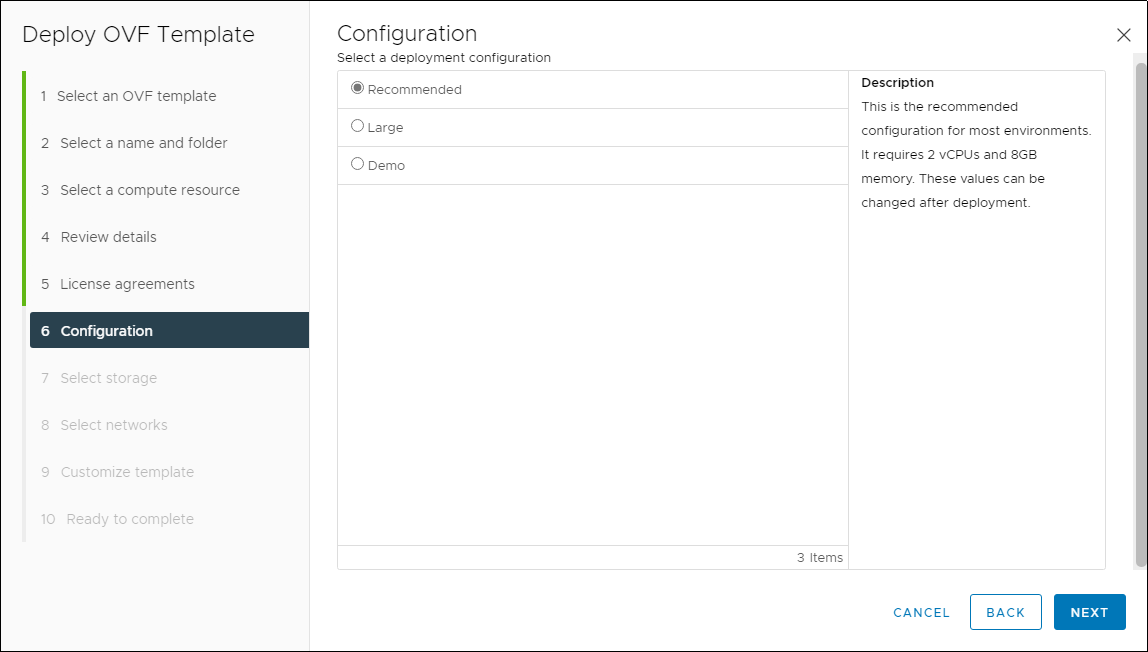
Deployment Size
- Select the appropriate storage and disk format for the appliance, then click Next.
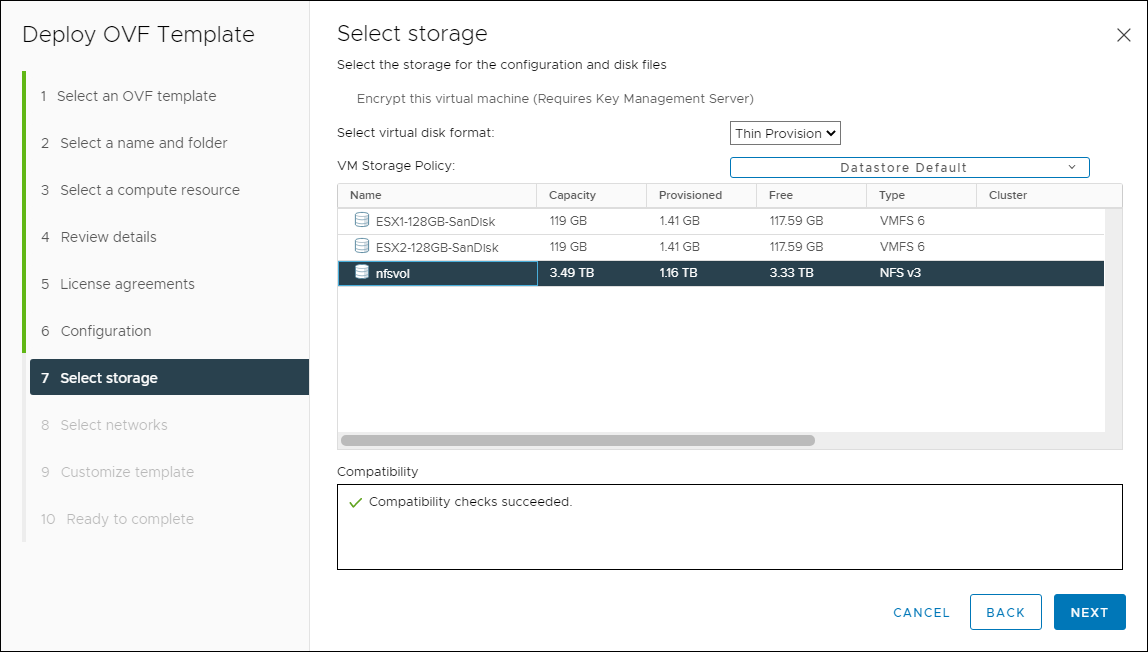
Select Storage
- Select the appropriate network, then click Next.
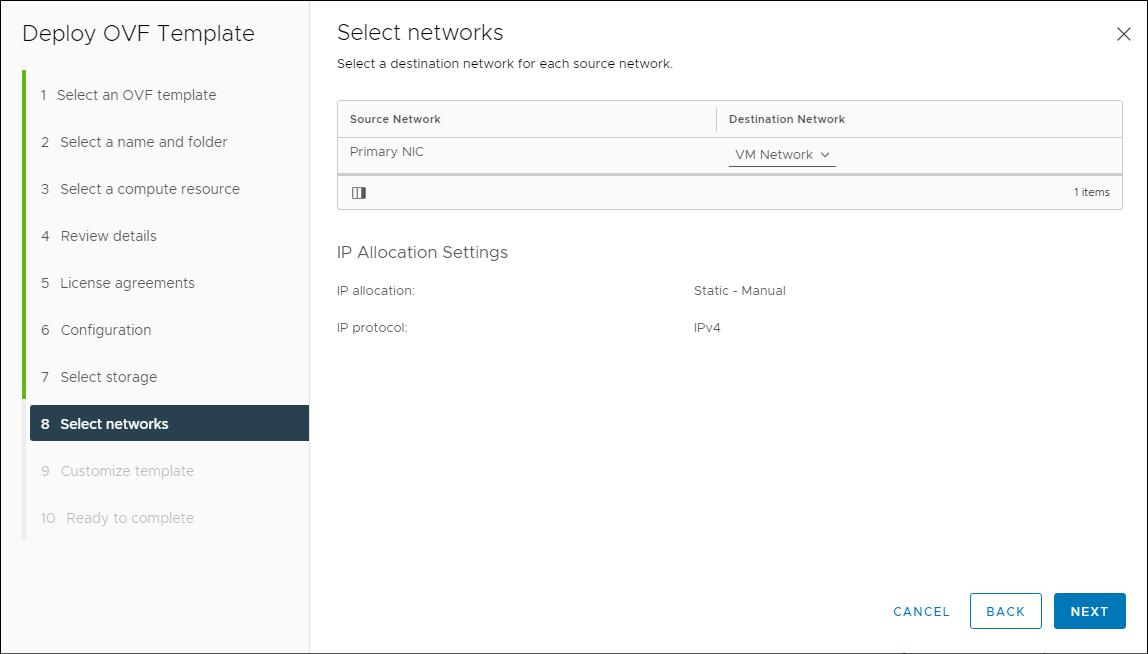
Select Network
- Provide the required information, then click Next.
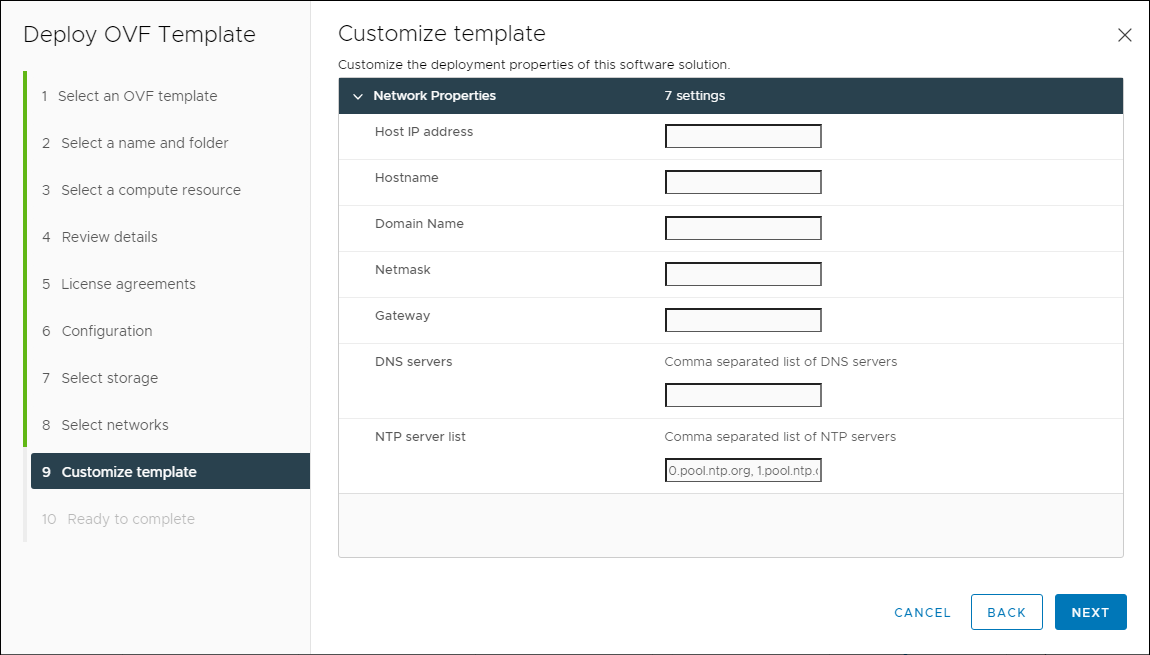
Appliance Properties
- Review the summary screen. If everything is correct, click Finish.
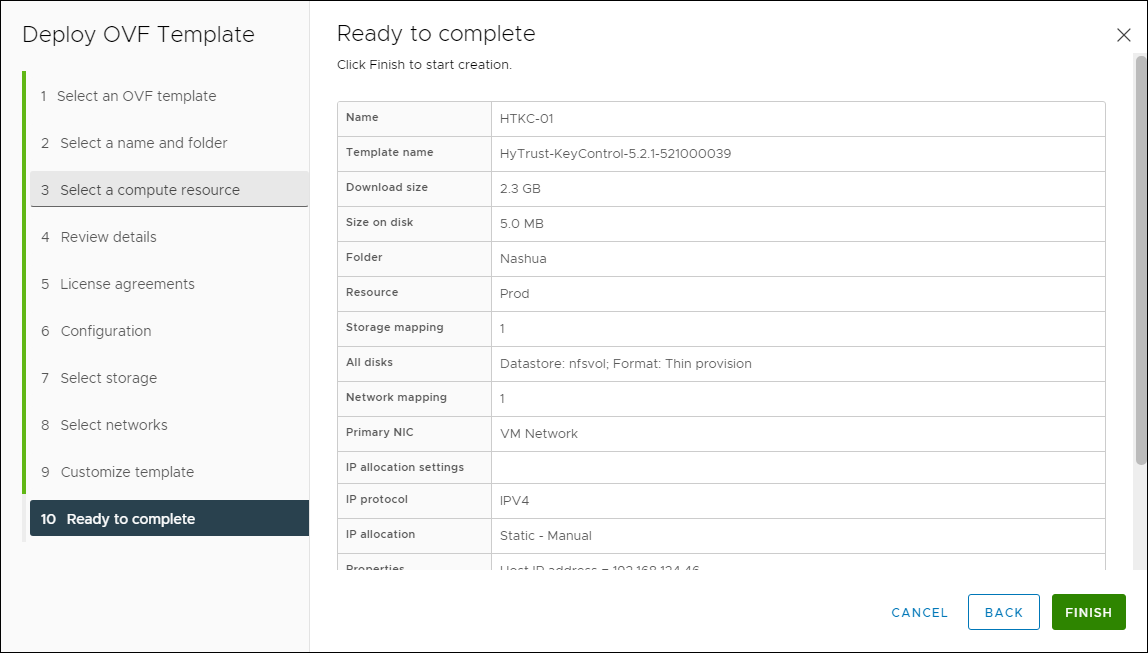
Review Settings
You have successfully deployed the first HyTrust KeyControl node.
Deploy the Second HyTrust KeyControl Appliance
Before moving forward, run back through the same steps again and deploy a second virtual appliance. I strongly suggest this because once you begin encrypting VM workloads, you should make sure you don’t lose access to them. Treat the Key Management Service (KMS) as critical as the Domain Name Service (DNS). Losing access to encryption keys could turn out to be a bad day for you. Later in the steps below, I will walk you through configuring both virtual appliances into a 2-node HA cluster.
After you have deployed the second appliance, come back to this point and work on configuring the first appliance.
Configure the First Appliance
-
Locate the newly deployed HyTrust KeyControl appliance. Power it on, then open a console to it.
-
Set the password for the system administrator account, htadmin on the appliance. Using the Tab key, move to OK and press Enter on your keyboard.
NOTE: This password controls access to the HyTrust KeyControl System Console, allowing users to perform some privileged KeyControl administration tasks.
After pressing OK, the networking and other subsystems are configured. This can take several minutes. So, be patient.

Specify htadmin Password
- After setup has completed, a window will display the management IP address of the appliance. Please make a note of the management IP address because you will need it in the next step. Tab to OK and press Enter on your keyboard.
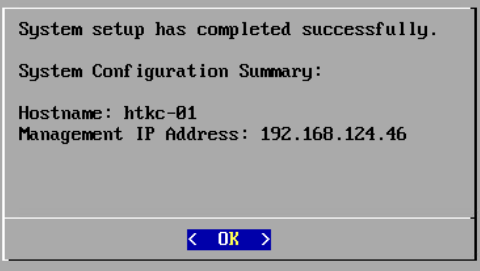
Setup Complete
Continue Configuration using the WebGUI
- Launch a web browser and navigate to the IP Address or fully-qualified domain name (FQDN) of the management IP address of the appliance. Use the following credentials to log in:
- User Name: secroot
- Password: secroot
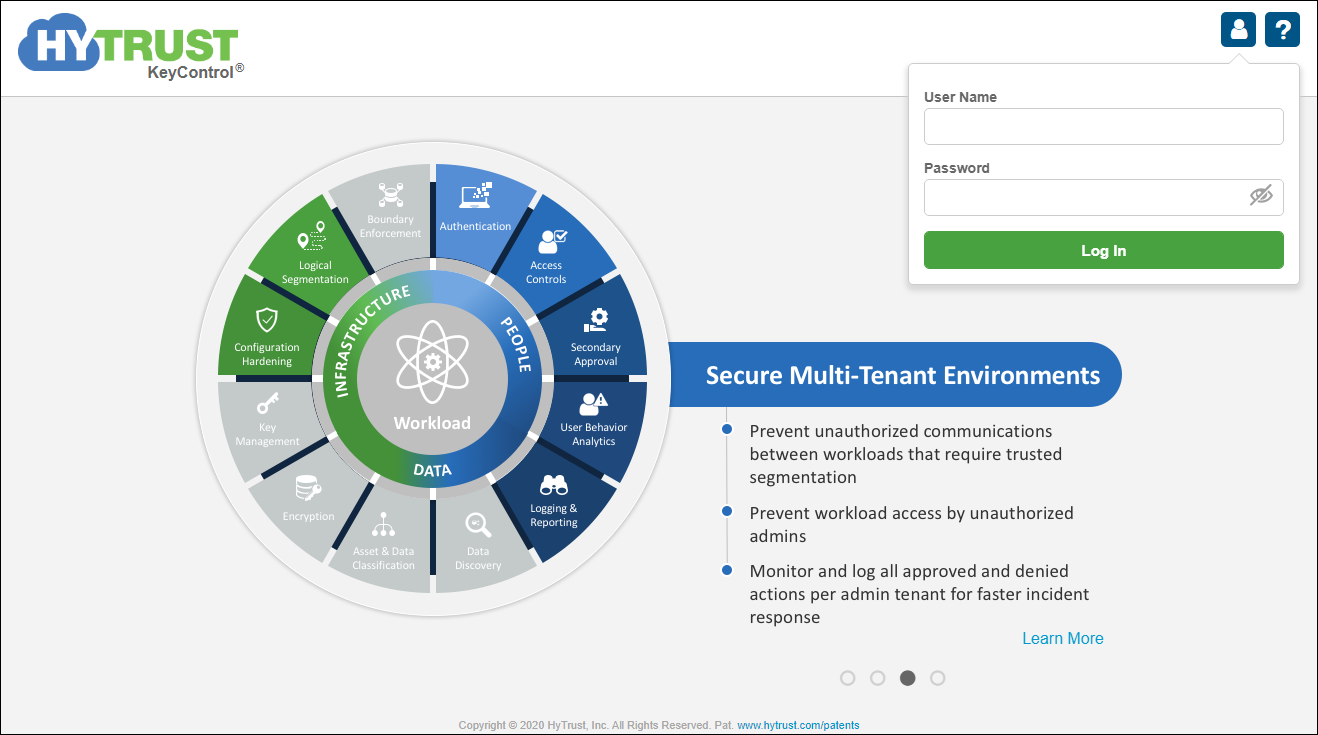
KeyControl Login screen
- Upon logging in, read and accept the EULA by clicking on, I Agree at the bottom of the agreement.
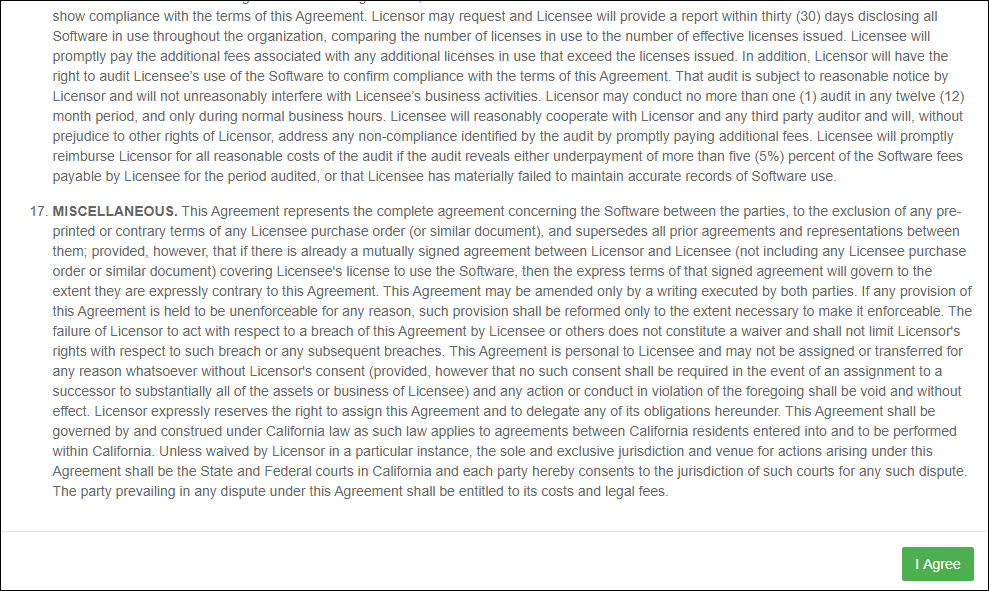
EULA screen
- Since this is the first KeyControl node, click Continue as a Standalone Node.
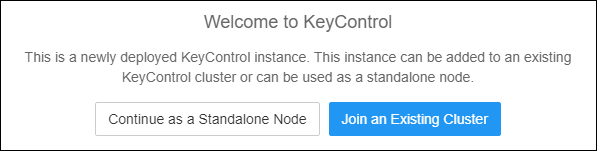
Welcome to KeyControl screen
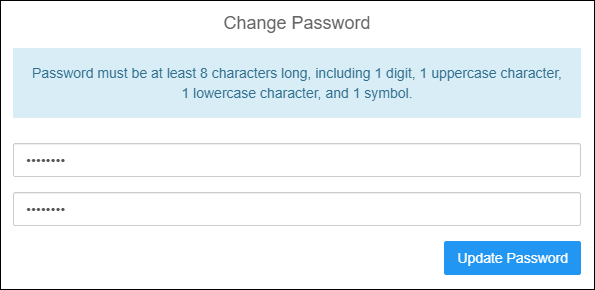
- Enter a new password for the secroot account, making sure to follow the password complexity rules, then click Update Password.
Change Password
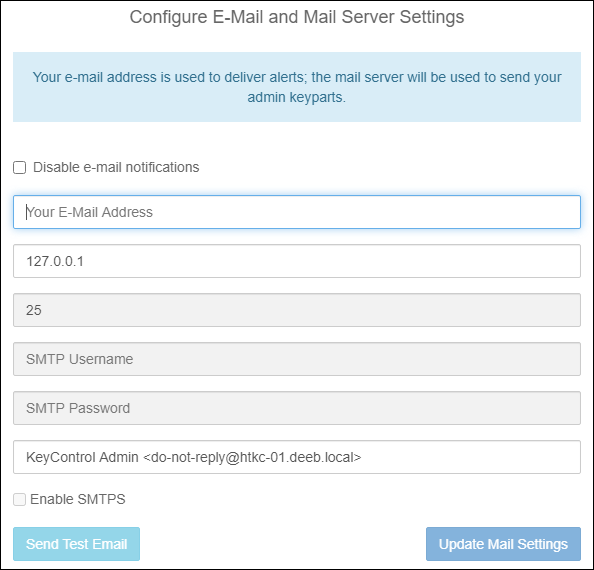
- Configure E-Mail and Mail Server Settings by entering the relevant information for your email address and email server.
I discourage you from disabling e-mail notifications because if you are running a trial, then you want to be notified when the trial license is about to expire. You will also miss out on potentially important system alerts. The same applies if you are not using a trial license.
If you do decide to skip this step, you can configure email notifications at a later time.
Email and Mail Server settings
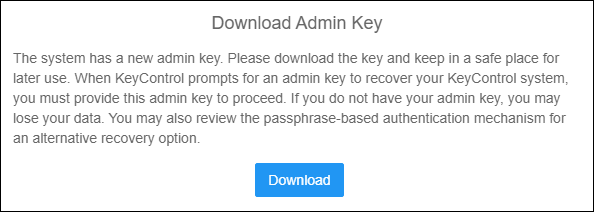
- This is a crucial step. Please, please, please click the Download button. Read through the entire text in this dialog. I want to stress that if you do not download the Admin key and for whatever reason you need to do some sort of recovery of the appliance, you MUST have this key. Otherwise, as the text states, you may lose access to your encryption keys.
Download Admin Key
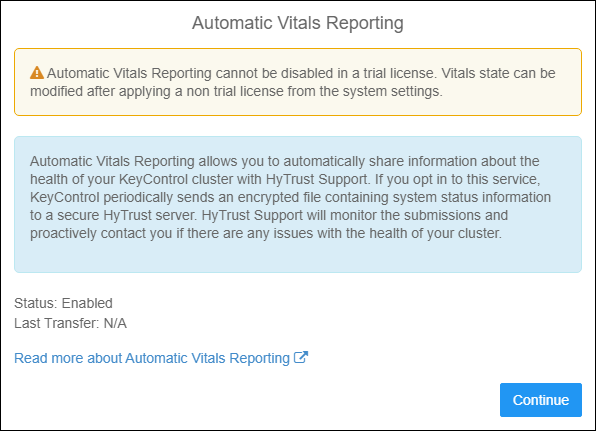
- If you are running a trial of KeyControl Vitals, reporting cannot be disabled. Otherwise, you can disable Vitals after you apply a purchased license. Vitals is a good thing. Trust me. Click Continue.
Vitals Reporting
After clicking the Continue button, the main WebGUI is displayed. You have successfully finished configuring the first node of the cluster. Move to the next step to add the second node to the cluster.
Adding the Second KeyControl Node to the Cluster
- Launch a web browser and navigate to the IP Address or fully-qualified domain name (FQDN) of the management IP address of the second appliance. Use the following credentials to log in:
- User Name: secroot
- Password: secroot
KeyControl Login screen
- Upon logging in, read and accept the EULA by clicking on, I Agree at the bottom of the agreement.
EULA screen
- Since this is the second KeyControl node, click Join an Existing Cluster.
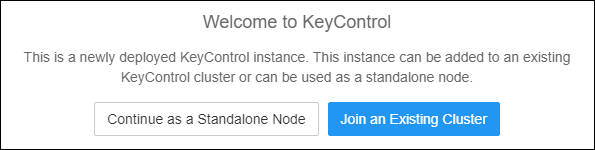
Welcome to KeyControl screen
- You will notice the workflow for configuring the second node is quite different. Review the information and click Continue.
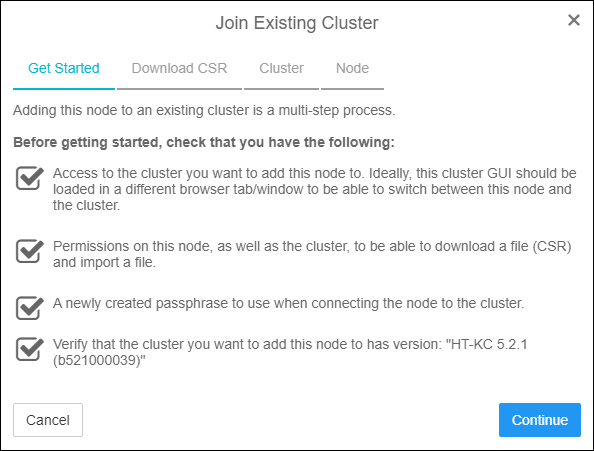
Getting Started with Cluster Join
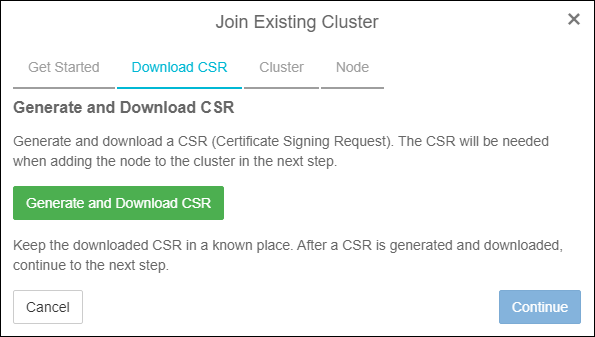
- Click Generate and Download CSR. This will place a .csr file in your downloads directory. We will need this file in just a few steps.
Generate & Download CSR
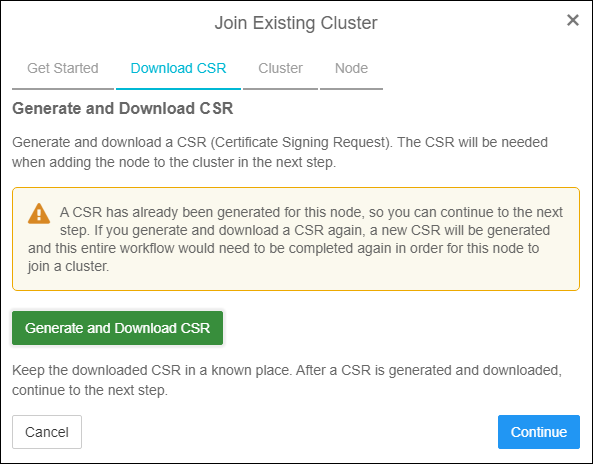
- Click Continue.
Downloaded CSR
- At this point, you need to open a new browser window or a new tab and login to the first KeyControl node. Do NOT click the continue button on this screen yet!
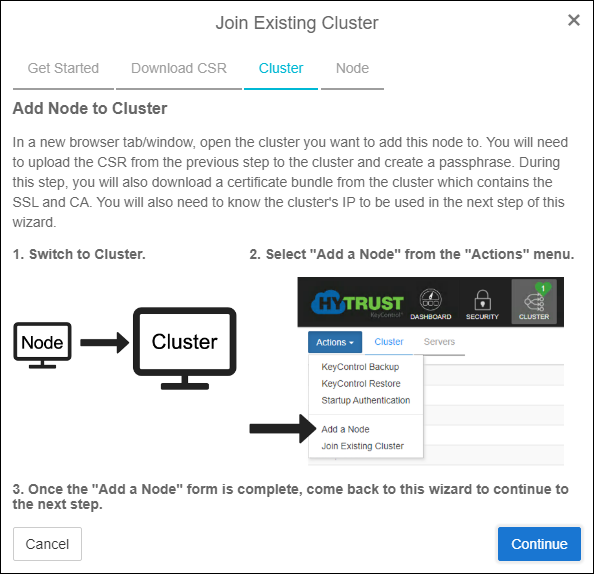
Add Node to Cluster
- After logging into the first KeyControl node, click Cluster in the top menu. Next, click the blue Actions button and select Add a Node.
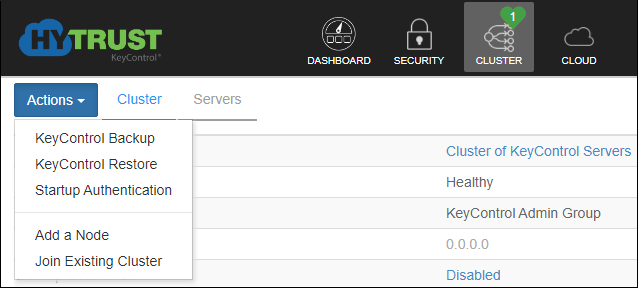
Add Node
- Click the Load File button and select the .csr file from step 6. Next, enter a passphrase that is at least 12 characters long. You will need this passphrase in an upcoming step. Click Save and Download Bundle. A zip file is placed in the downloads directory on your computer. The zip file contains both an encrypted SSL certificate in .p12 format and a CA certificate in .pem format.
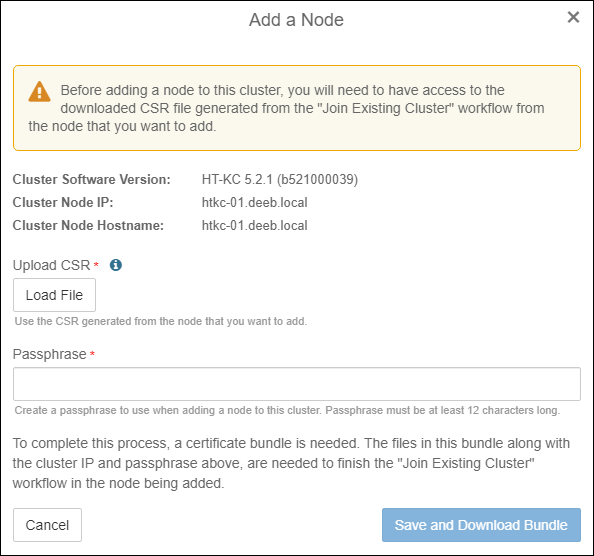
Load CSR
- As the window states, click OK and switch back to the browser window or browser tab of the second node, you are in the process of adding to the cluster.
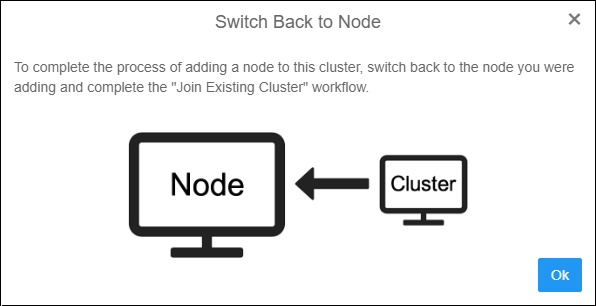
Switch to First Node
- Now, you can click the Continue button on this screen.
Click Continue
- Under Upload SSL Certificate click the Load File button and select the encrypted SSL certificate. The SSL certificate is the file that does NOT have a .pem extension. Under Upload CA Certificate click the Load File button and select the CA certificate. This is the file that has a .pem file extension (cacert.pem). Enter the passphrase that you created back in step 9. Click Join.
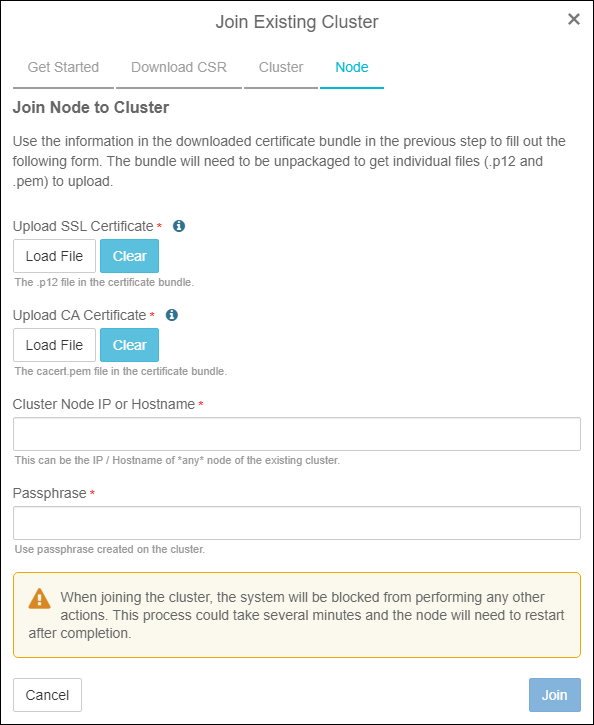
Upload Certificates
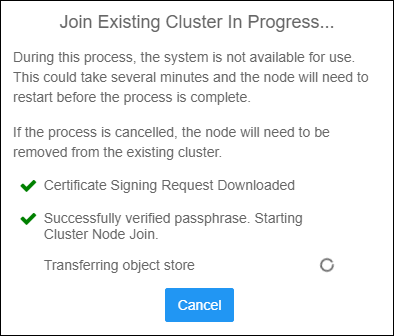
- After clicking the join button, the joining process will display the steps it takes to join the node to the cluster. The second node will be restarted during this process
Cluster Join Progress
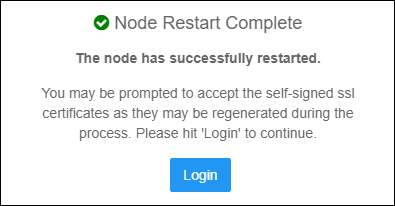
- After the node has successfully restarted, click the Login button and login to the newly joined node. You will use the new secroot password you created during the configuration of the first KeyControl node.
Node Addition Successful
After logging into the second node, you will notice that the Cluster button in the top menu will show a green number two. Click to see all of the nodes in the cluster.

Confirm Node Status
Pat yourself on the back. You have successfully created a 2-node HyTrust KeyControl KMS cluster.
Summary
In summary, creating a Key Management cluster involves a few steps. But, it should be something you can complete in under 30 minutes. I do this regularly and can go through this process in under 15 minutes.
In a follow-on blog, I will write about connecting this cluster to vCenter v7 so you can begin encrypting VMs.
Related Posts
Here are links to related posts:
- How to add a HyTrust KMS to vCenter v7 as a Key Provider
- How to Deploy a 2-node Entrust KeyControl v5.4 cluster
If there is something you think I’m missing and feel should be added, please let me know.
Thanks for reading!