How to resolve an untrusted OVA Certificate in vCenter
In this blog post I'm going to cover the steps to resolve an untrusted or invalid certificate of an OVA when deploying a new virtual appliance in vCenter.

When deploying an OVA in vSphere 8, it is not uncommon for the workflow to flag the OVA publisher certificate as untrusted. This can be a significant issue for organizations that prioritize security. In this blog post, I will cover how to overcome this issue.
The Problem
Deploying an OVF Template/OVA is a common operation for a VMware Administrator. You right-click on the ESX Cluster or an ESX host in the inventory browser and click Deploy OVF Template. This action initiates the Deploy OVF Template workflow. Typically, there are ten steps to this workflow. The first three steps ask for:
- The path to the OVF/OVA
- The name of the virtual appliance and a vCenter folder to store it
- The name of a compute resource, such as an ESX host or ESX Cluster
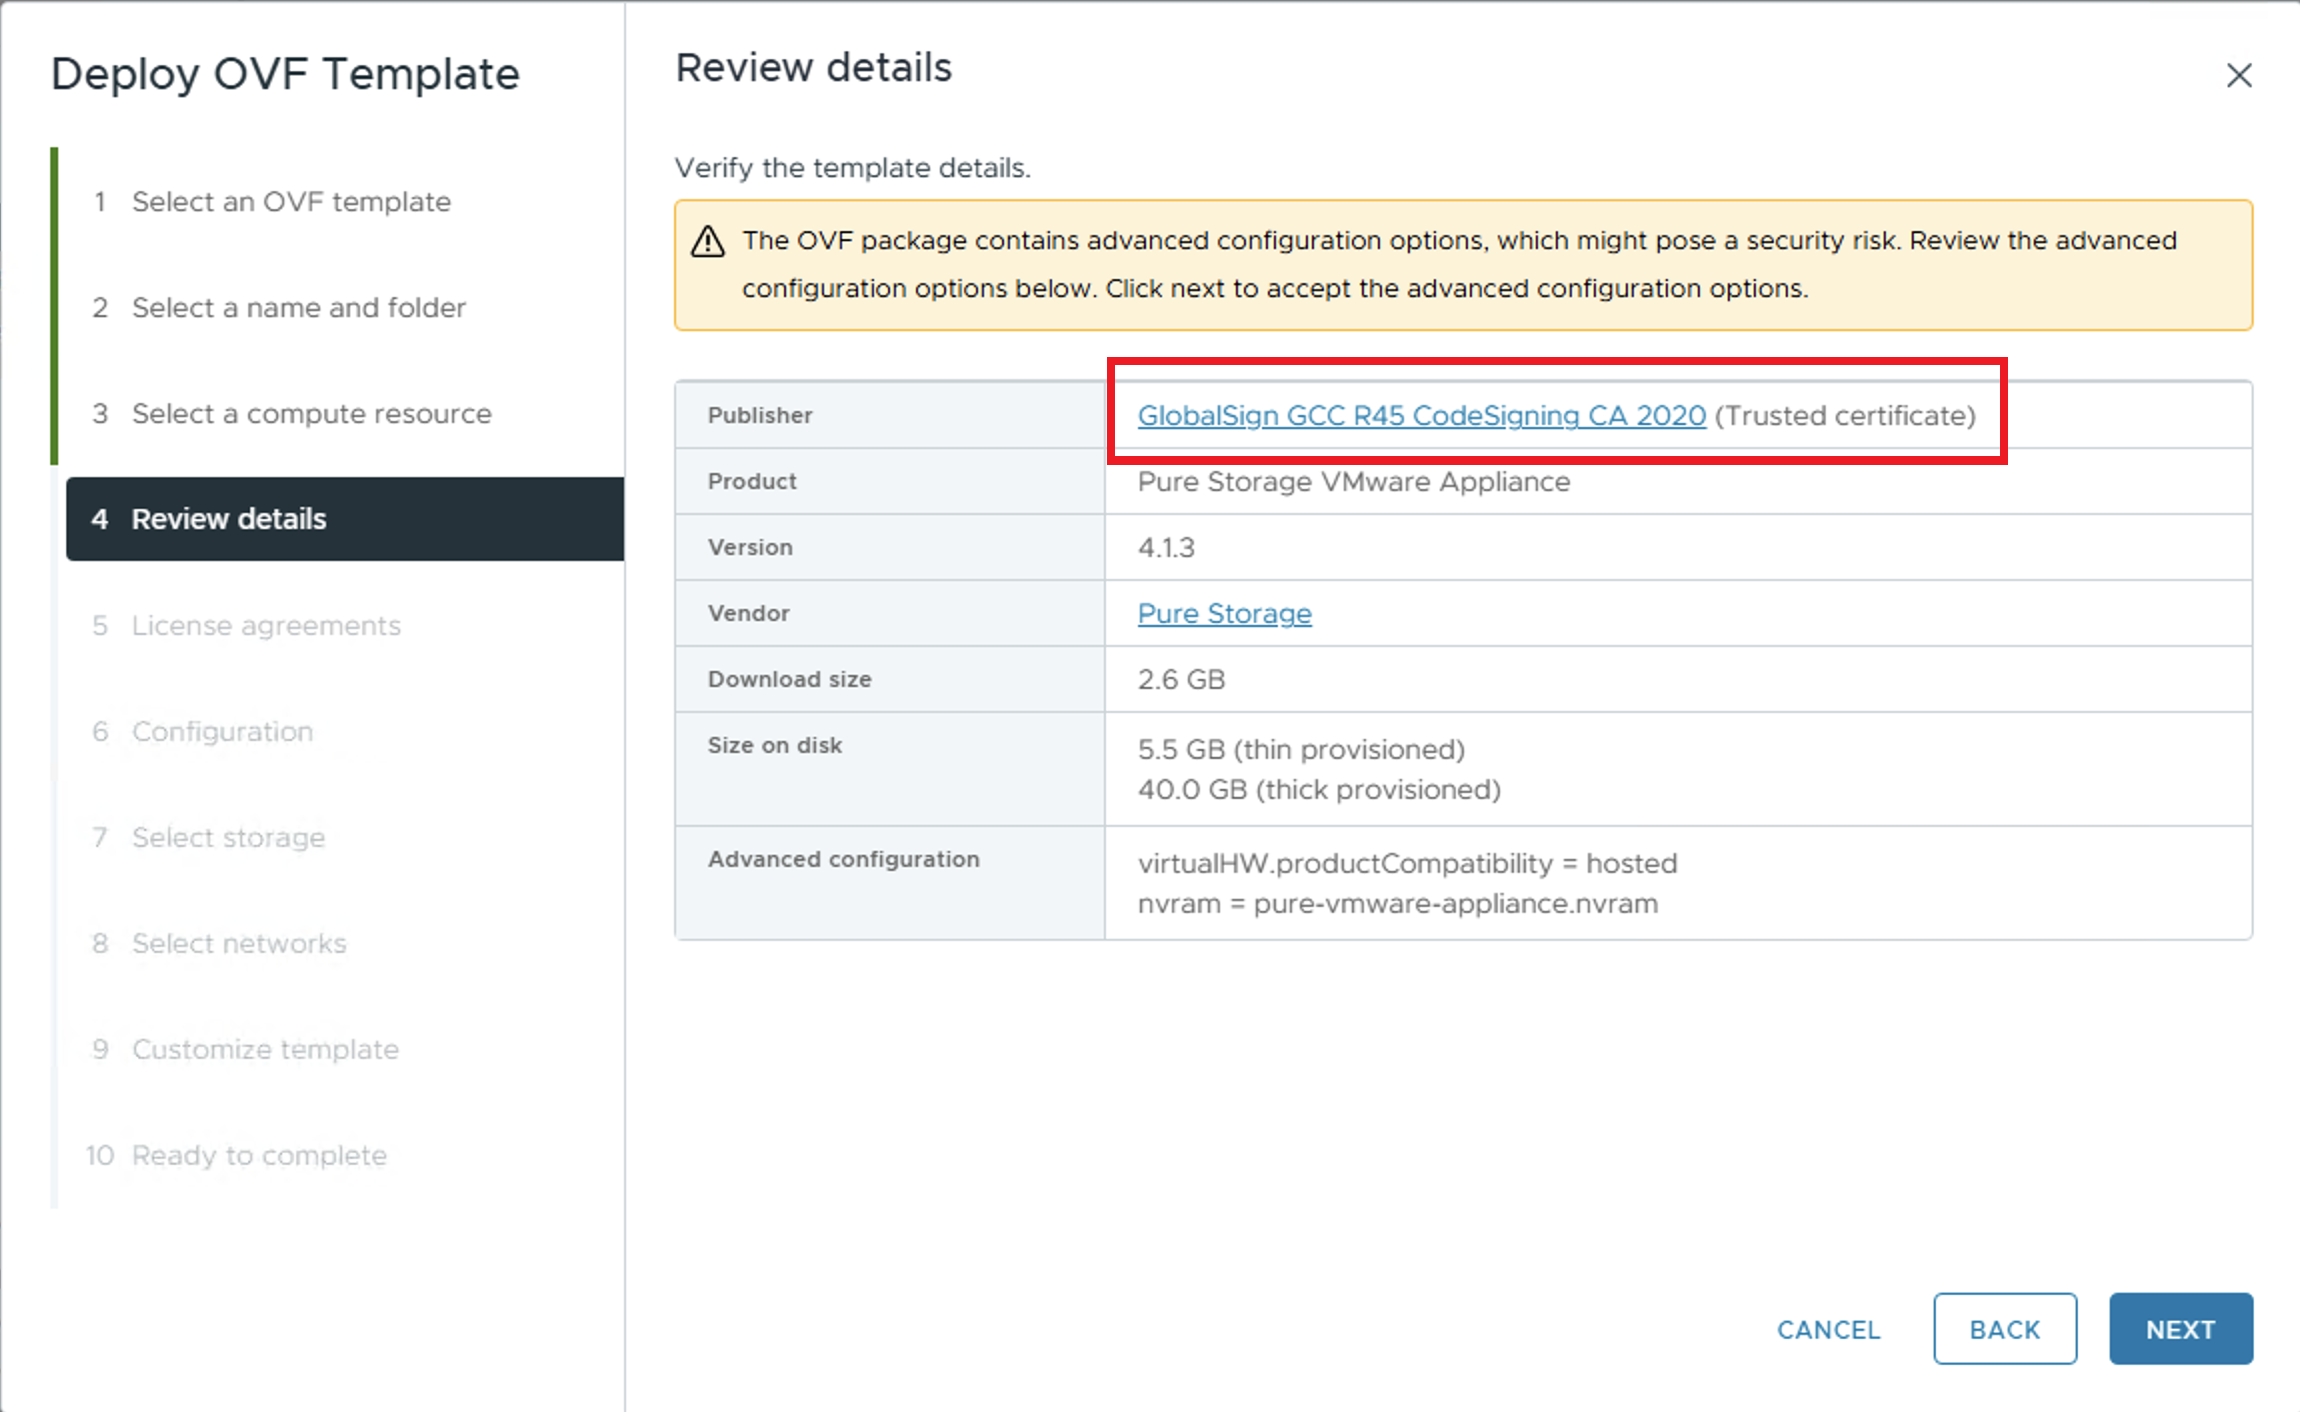
The fourth step involves reviewing the details of the OVF/OVA package, which may pose a security risk to the virtual environment.
One of the items the user should review is the Publisher information.
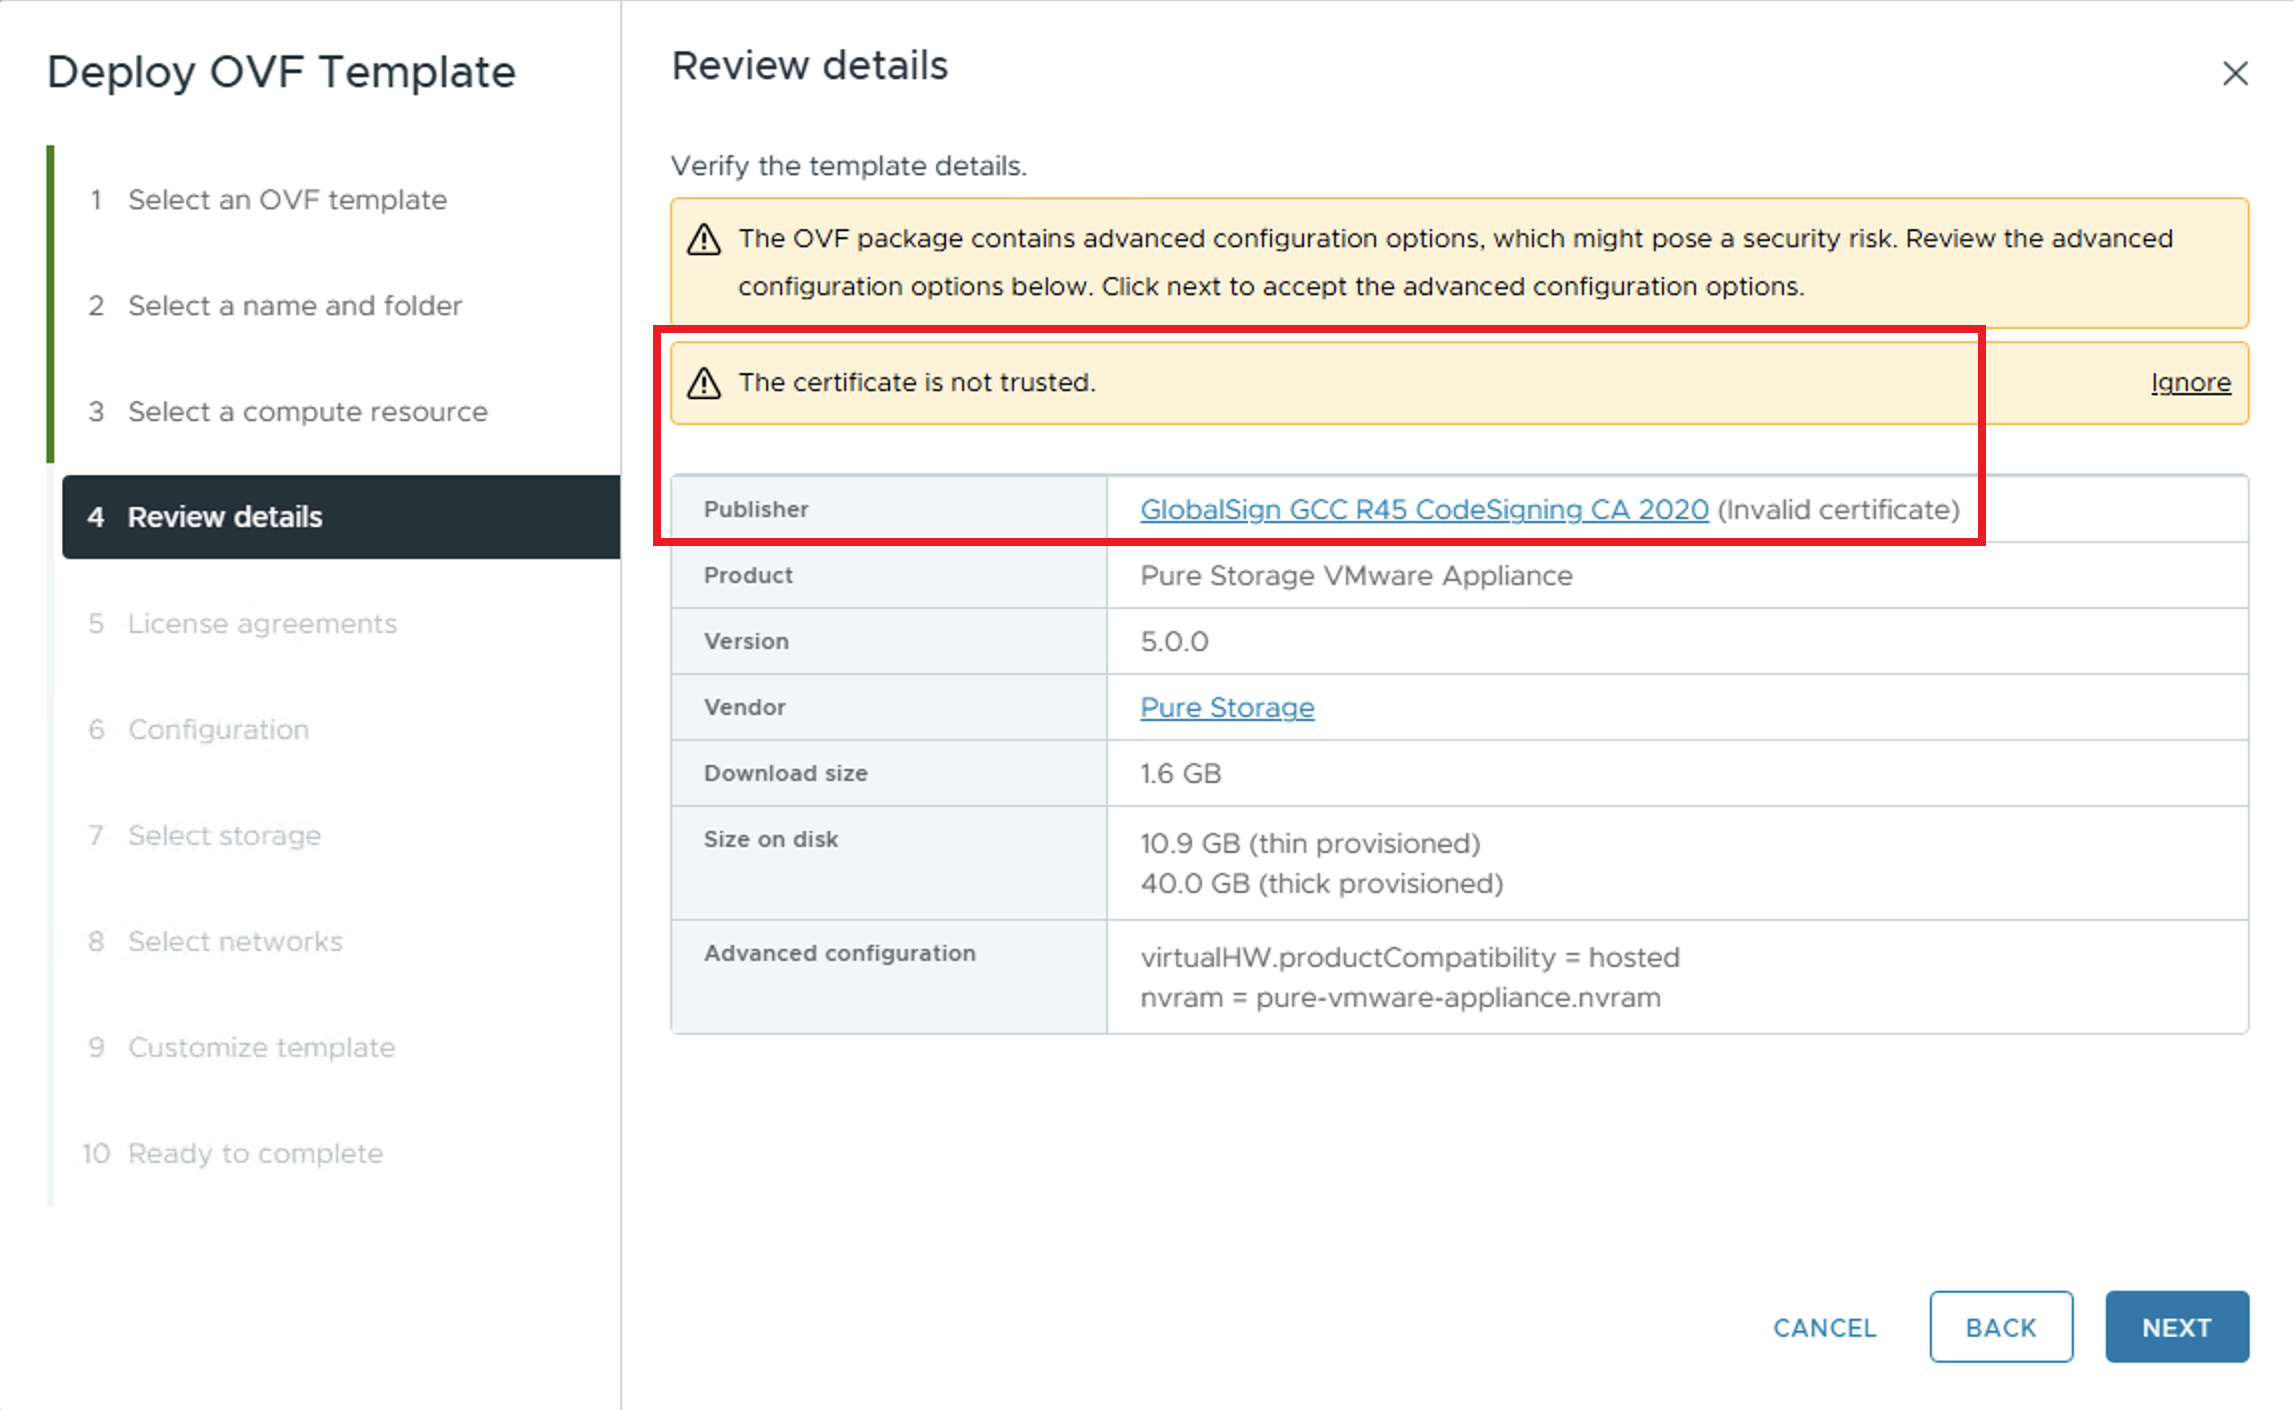
Invalid/untrusted Publisher certificate
Often, the certificate used by the Publisher to sign the OVF/OVA appears to be invalid. This issue occurs because vCenter is unable to verify the root certificate and the intermediate certificate used by the Publisher to sign the OVA. The certificate chain is missing from the VMware Endpoint Certificate Store (VECS) in vCenter. There are multiple ways to fix this issue so vCenter can validate the certificate used to sign the OVA.
If you don’t care about the invalid certificate then you can simply click the ignore link.
https://knowledge.broadcom.com/external/article/336085/deploying-ova-shows-invalid-certificate.html
Quick Fix
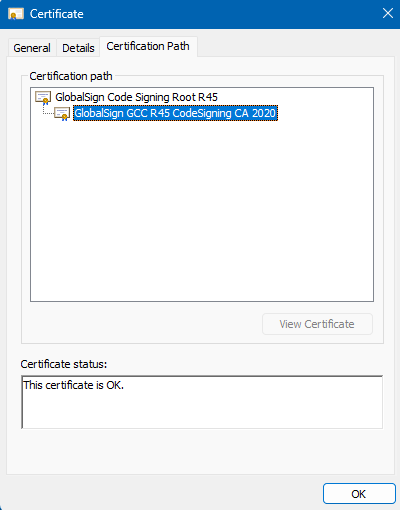
The quickest way to resolve this issue is to click the certificate name presented in the Publisher field. In the image above this refers to the blue highlighted link in the above image: GlobalSign GCC R45 CodeSigning CA 2020. When you click the link the certificate will be downloaded to your computer. It will have the name: GlobalSign GCC R45 CodeSigning CA 2020.cer You can view the entire certificate chain by double-clicking the downloaded file. On Windows click the Certification Path tab to view the certificate chain.
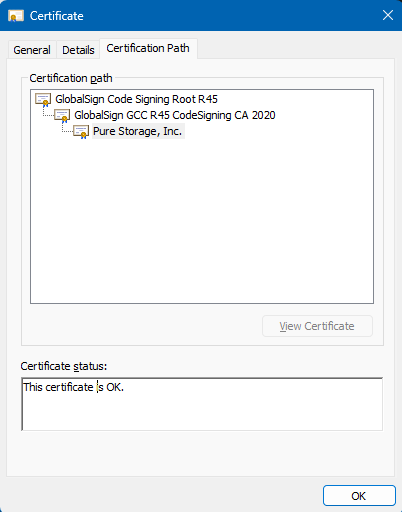
Certificate chain for the signed Pure OVA
With this information in hand we can do a web search for GlobalSign Intermediate Certificates. The first returned link should be what we want. Click the link. You should be taken to a web page where you will find all of the GlobalSign intermediate certificates. If you get lost click on this URL: https://support.globalsign.com/ca-certificates/intermediate-certificates
Scroll down the page until you find the square named Code Signing (Standard & EV) Intermediate Certificates and click the button to
go to the web page listing all of the code signing intermediate certificates. If you get lost you can click on this URL:
https://support.globalsign.com/ca-certificates/intermediate-certificates/code-signing-standard-ev-intermediate-certificates
Once on this page scroll down until you see the following:
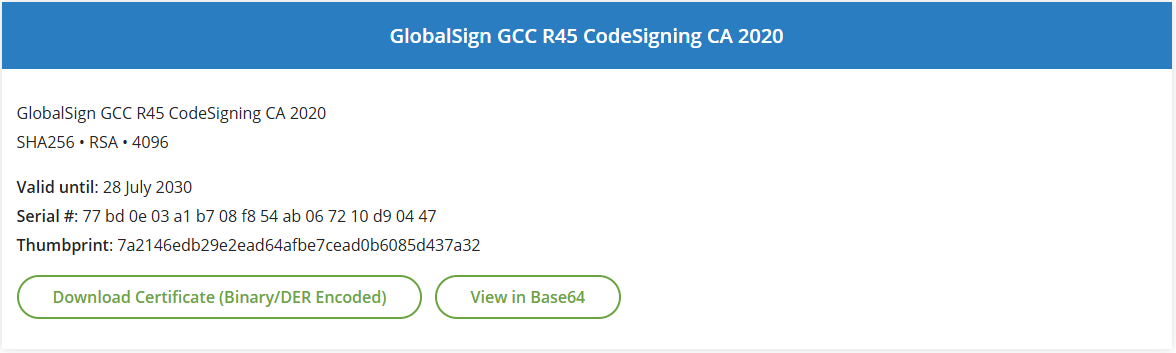
GlobalSign Code Signing Intermediate certificate download link
Click the button Download Certificate (Binary/DER Encoded) to download the certificate in Binary/DER Encoded format to your computer. Next, click the downloaded file: gsgccr45codesignca2020.crt and click the Certification Path tab.
GlobalSign Code Signing Intermediate certificate
This file contains the missing certificate chain without the certificate that signed the OVA. If you really want to ensure this is the same root and intermediate certificates used by Pure Storage to sign the OVA you can click on each certificate and confirm the serial numbers and/or the thumbprints match.
Converting the Certificate
At this point you have the certificate chain you need, but it is in the wrong format. vCenter only accepts certificates in PEM format. PEM format is a text representation of the certificate in base64 format. The DER format is a binary representation of the certificate. So, you need to convert the certificate using a tool like OpenSSL. If you are on Windows I recommend going to the following URL and choosing an option for Windows: https://github.com/openssl/openssl/wiki/Binaries
If you are on a Mac, then you don’t have anything to worry about. OpenSSL is already there.
Once you are ready you can run the following command to convert the certificate to PEM format.
openssl x509 -inform der -in gsgccr45codesignca2020.crt -out gsgccr45codesignca2020.pem
If you would like to confirm the certificate has been converted simply open the gsgccr45codesignca2020.pem file in your favorite text editor. It will look identical to what you would have seen had you clicked on the View in Base64 button. You can also run the following OpenSSL command:
openssl x509 -in gsgccr45codesignca2020.pem -text -noout
Importing the Converted Certificate into vCenter
Now it’s time to import the newly converted certificate into the VMware Endpoint Certificate Store (VECS) in vCenter.
- Login to vCenter and click the hamburger icon in the upper left-corner of the window
- Click Administration
- Click Certificate Management
- Click on the Trusted Root tab to view all of the trusted root certificates in the VMware Endpoint Certificate Store (VECS).
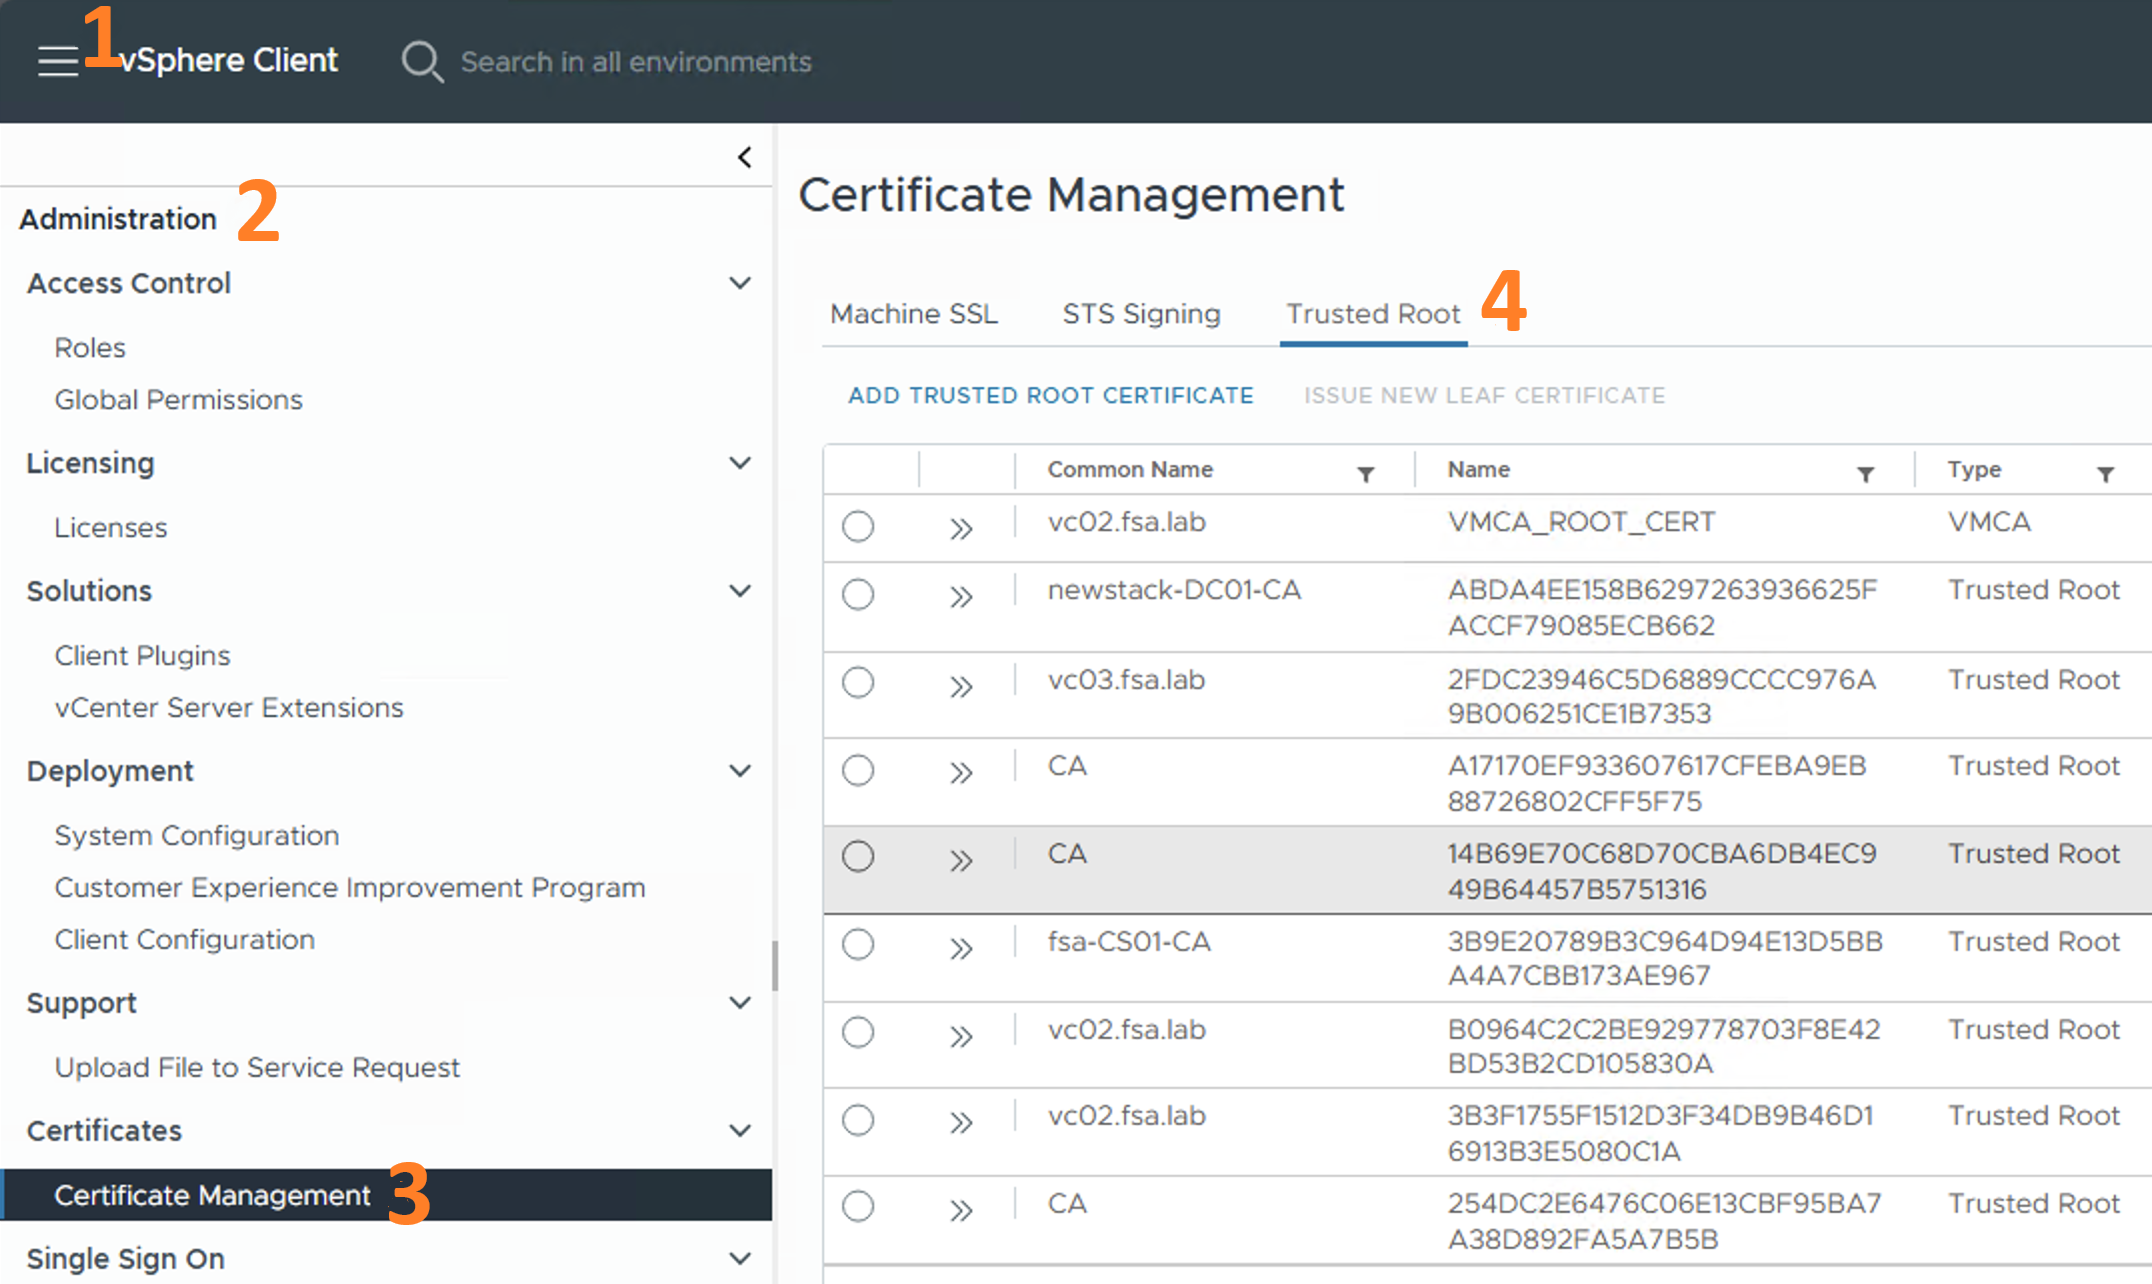
Administration --> Certificate Management
Next, click on the Add Trusted Root Certificate link and work through the process to add the certificate to the VECS. After adding it to the VECS you should see the following in the list:

Newly added certificate
Trusted OVA!
Now that the certificate has been uploaded to the VECS you can deploy the OVA again. This time you will notice the publisher certificate is now trusted as shown in the image below.
Trusted certificate
At this point you are done!
Summary
Let’s summarize what we covered in this post:
- The Publisher for the Pure Storage OVA was untrusted
- We downloaded the certificate chain from GlobalSign and converted it to PEM format
- We added the certificate to vCenter
- We redeployed the OVA and now the certificate is trusted
If there is something you think I’m missing and feel should be added, please let me know.
Thanks for reading!